ENGLISH-musculoskeletal disorder part-3
1)Explain the Kyphosis (hunchback). Describe kyphosis .
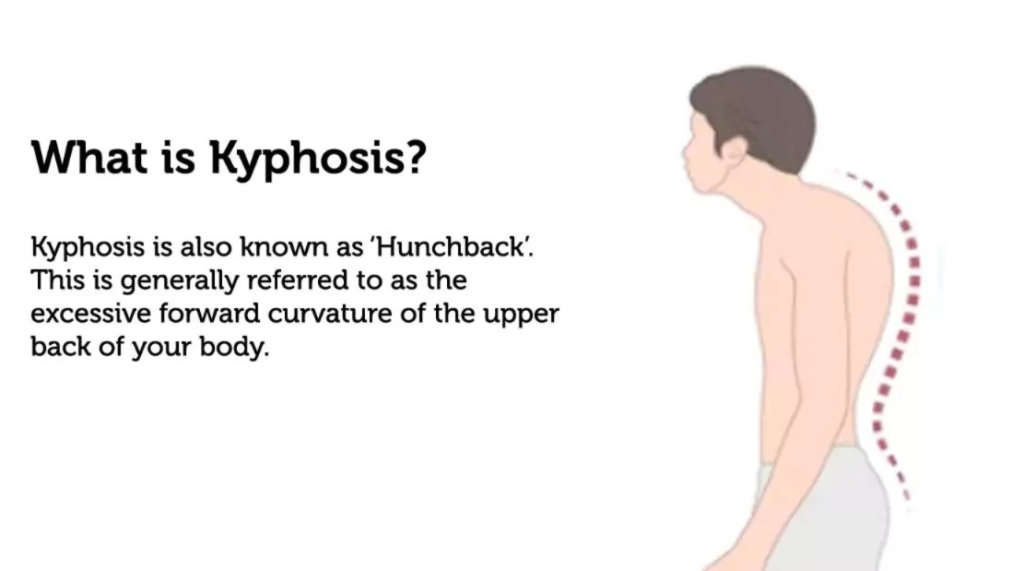
- Kyphosis is an abnormality of the spine in which the spinal cord is curved outward.
- The spinal cord becomes rounded or hunchbacked.
- In kyphosis, the convexity of the spine increases outward.
explain the type of kyphosis. describe)
1) angular (angular)
- knuckle (knuckle)
- gibbus ( gibbus)
2)Round ( round)
other type:=
- 1)postural kyphosis
- 2)scheuermann’s kyphosis
- 3)congenial kyphosis
1) Angular
In kyphosis, the vertebrae of the spinal cord form a curved curve.
and form an angle.
knuckle
In this, only one vertebra in the spinal cord is curved.
gibbus ( Gibbs)
In this, there is an involvement of more than two vertebrae in the curvature of the spinal cord.
2) Round (Round)
In this, there is an involvement of more than three vertebrae in the curvature of the spinal cord.
In this, many vertebrae come together and form a round shape curvature.
Other type of kyphosis:=
1)Postural kyphosis (Postural Kyphosis)
- Postural kyphosis is the most common type of kyphosis.
- Postural kyphosis is mainly caused by abnormal posture.
2)scheuermann’s kyphosis ( Scheuermann’s kyphosis)
- Kyphosis is primarily named after the Danish radiologist.
- Sheuermann kyphosis primarily affects the thoracic spine.
- This is mainly found in the (lower) lumber back area.
3)congenital kyphosis
- In some infants, the spinal cord is not properly developed during intrauterine life.
2)Explain the Etiology.
- Due to degenerative diseases of the spine.
- Injury Due to.
- Trauma.
- Scoliosis.
- One vertebra is pushed forward over another.
- Marfan syndrome.
- Infection.
- Muscular dystrophy.
- Neurofibromatosis.
- Paget’s disease.
- Polio.
- Poor posture.
- Age.
- Osteoporosis (weakening of bone).
- Injury to the spinal cord Due to.
- Congenital abnormality.
- Ankylosis spondylosis.
- spina bifida.
- tumor and endocrine disease.
explain the Clinical manifestation/sign and symptoms .
- poor posture.
- “hunchback ” .
- Round back appearance.
- Mild back pain.
- Difficulty breathing.
- Upper back and neck Burning sensation in the area.
- Muscle fatigue.
- Pulmonary and heart failure.
- Spine stiffness.
- Loss of bowel and bladder control.
explain the diagnostic evaluation.(Diagnostic Write an evaluation.)
- History taking and physical examination.
- Neurological examination.
- X Ray.
- ct scan .
- MRI.
- Pulmonary function test.
Management :
Explain the medical management.
- Provide bone strengthening drugs to strengthen the bones of the spinal cord and prevent fractures.
- Tell a child with Scheuermann’s disease to wear body braces to prevent progression of kyphosis and prevent bone growth.
- Do stretching exercises that increase the flexibility of the spinal cord.
- Exercise strengthens the muscles and the body Improves posture.
- Exercise strengthens the abdominal muscles and helps improve body posture, so the patient should be asked to exercise.
- If the kyphosis is more severe, surgery is needed to reduce the spinal curvature.
- Surgery involves “spinal fusion.”
- Provide analgesic medicine to the patient.
explain the nursing management of Kyphosis.
- Elevate the affected leg.
- Instruct the patient to take adequate rest.
- Instruct the patient to engage in maximum activity.
- Instruct the patient to adopt relaxation techniques.
- Reduce muscle tension.
- Inspect the skin daily and check for any redness, warmth, or pressure sores.
- Assess the patient’s circulation.
- Instruct the patient to exercise regularly.
- Ask the patient to do range of motion exercises.
- Ask the patient to do daily routine exercises in small amounts.
- Provide the patient with all the information about the treatment and the disease properly.
- Clear all the doubts of the patient and his family members.
- Provide counseling to the patient to provide coping abilities.
1) Explain the Lordosis.
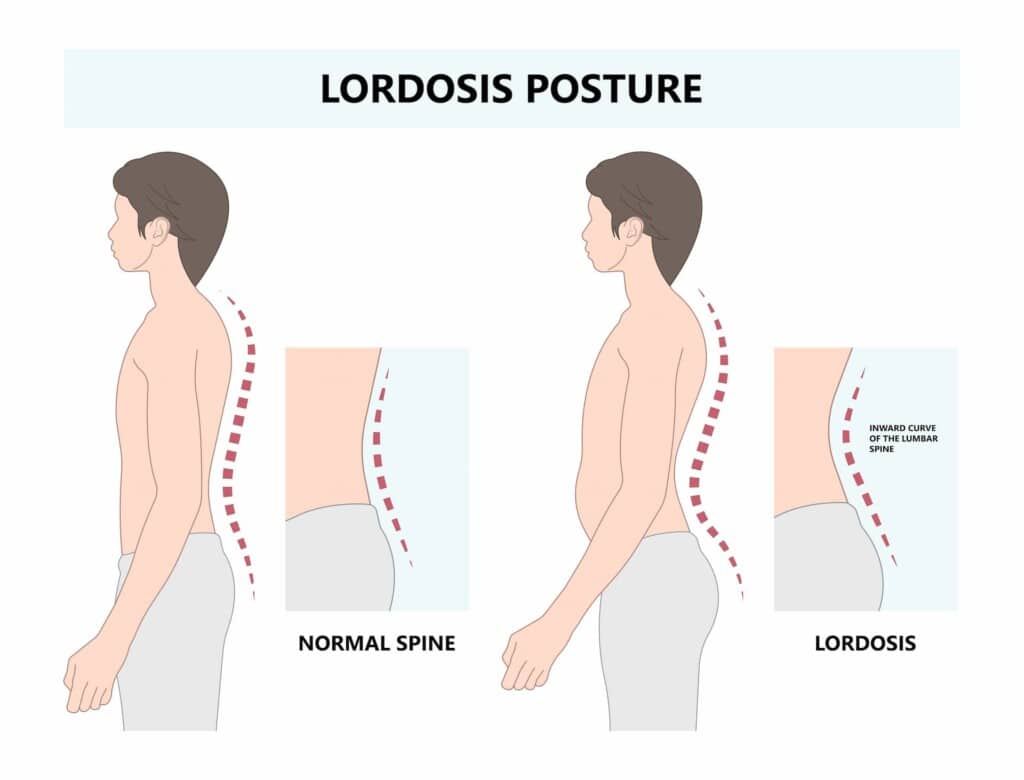
- In Lordosis, the curvature of the lumbar spine increases inward curvature.
- Therefore, in Lordosis, a “sway back” (swayback means the pelvis tilts forward and the abdomen protrudes) is seen.
explain the type of Lordosis (Write the type of Lordosis.)
1) Cervical Lordosis.
- This Lordosis is found in the cervical region.
2)Lumber Lordosis
- This lordosis is found in the lumbar region.
3)Hyper Lordosis
- In this, there is a lot of inward curvature in the lumbar region.
4)Hypolordosis
- In this, there is a slight inward curvature in the lumbar region.
explain the Etiology (explain the cause)
- Because of obesity.
- Kyphosis.
- Rickets.
- Pregnancy.
- Due to excess fat.
- Due to inflammation (dicities) in the intervertebral discs.
- Due to developmental abnormalities at birth.
- Spondylolithiasis (in which the vertebrae in the lumbar region are pushed forward)
- Osteoporosis (in this case, the bones become fragile).
- achondroplacia (in this case, the bones do not grow normally and instead remain short.)
- Due to abnormal posture.
- Muscular imbalance.
Clinical Manifestations (Clinical manifestations):
- Symptoms in lordosis depend on its severity.
- Back pain.
- Muscle pain.
- “sway back “appearance.
- Discomfort in the lower back.
- Problems with movement.
- numbness, tingling sensation.
- Loss of bowel bladder control.
- Difficulty in standing.
- Compression of the spinal cord.
- Weakness in the legs.
explain Diagnostic evaluation
- History taking and physical examination.
- X Ray.
- ct scan.
- MRI.
- neurological examination.
explain the management of Lordosis.
Treatment of lordosis depends on its severity.
if mild cases
- Asking the patient to do yoga increases body strength, flexibility and range of motion.
- Asking the patient to do physical therapy.
- Asking the patient to do enough exercise.
- Use braces in children and teens.
- Provide the patient with analgesic medicine and take measures to reduce swelling.
explain surgery:=
1) Spinal fusion
- In this, more than two vertebrae of the spinal cord are joined together and the moment is prevented.
2)Discectomy
- In this, the damaged disc in the spinal cord is removed.
3)Laminectomy
- In this, the damaged disc in the vertebra is removed. The lamina is removed.
explain the prevention of Lordosis.
- To prevent lordosis, weight should be limited.
- Good posture should be maintained.
- Human being should exercise regularly. Telling a human being to do exercise.
- Telling a human being to do regular physical activity.
Range Of Motion Exercises (ROM: Range Of Motion Exercises):
Range of motion exercises help patients who are unable to move. Exercises help maintain joint mobility and muscle strength. Exercises are performed once or twice a day. Exercises can be performed independently or with an assistant.
“Range of motion” exercises Types (Types of “Range of Motion” Exercises):
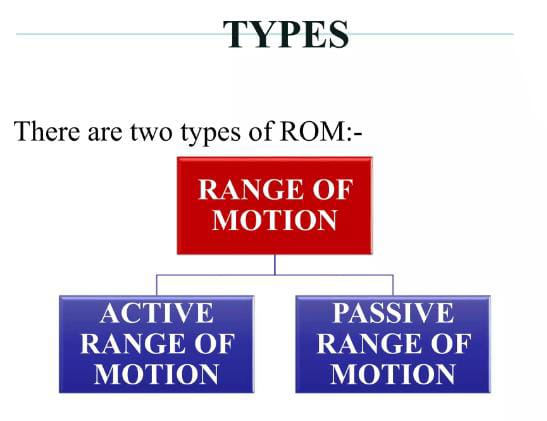
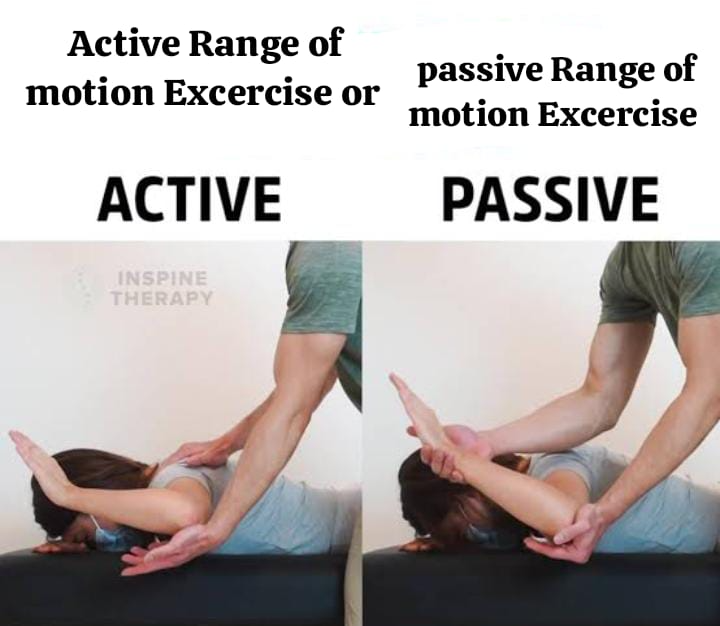
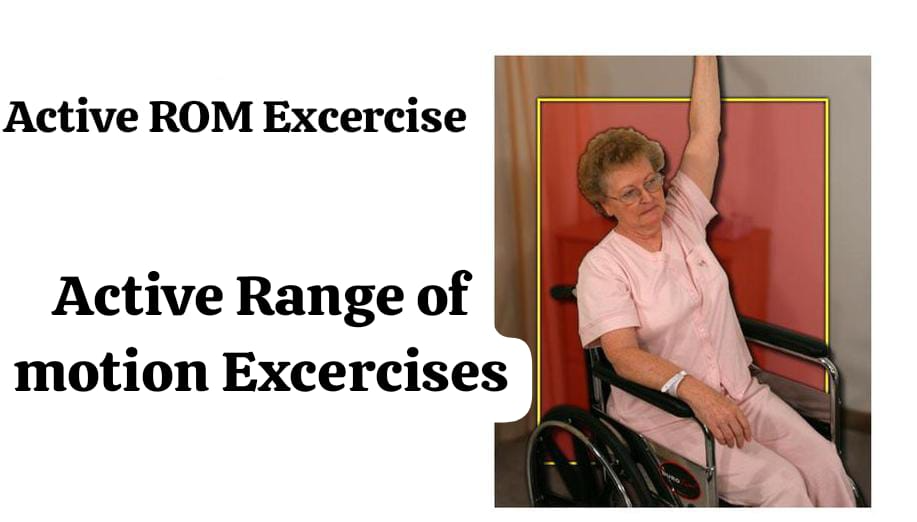
1.Active Range of Motion Exercises
2.Passive Range of Motion Exercises
1. Active Range of Motion Exercises:
Active range of motion exercises are exercises in which the patient exercises himself. In these exercises, a nurse or physical therapist supervises the patient who is exercising to see if the patient is exercising properly.
Doing these active range of motion exercises increases muscle strength and helps maintain muscle strength. Doing these exercises can prevent joint problems and contractures from developing.
2. Passive range of motion Passive Range of Motion Exercises:

Passive range of motion exercises are exercises that a nurse or physical therapist can perform for a patient. These types of exercises are designed for patients who are completely For patients who are immobilized and unable to do range of motion exercises, a nurse or physical therapist performs these exercises because in range of motion exercises, the muscles do not contract and muscle strength increases and is also maintained. These can only be performed by a nurse or physical therapist.
Points to remember while performing range of motion (ROM) exercises:
- When assessing range of motion, the nurse physically examines the client for stiffness, swelling, pain, limited movement, and uneven movement. Do.
- Set a specific time schedule for the patient to exercise.
- Provide proper support to the patient when performing movements for a weak client.
- Perform the exercise only if the patient is able to do it.
- If the patient does not have a contraindication to exercise, move the extremities through the full range of motion as much as possible.
- Movement should be done slowly and smoothly, which can reduce the level of pain.
- Do not move the joint beyond its capacity.
- Repeat one movement five times during the exercise.
- The nurse should stand near the patient’s bed while performing passive range of motion exercises.
Indications for exercise:

- Important to reduce the risk of injury to the musculotendinous unit.
- To reduce prolonged immobilization.
- It is necessary to maintain normal range of motion of joints and soft tissues.
- To prevent contracture of muscles.
- To maximize the flexibility of joint tissues.
Contraindications for exercise:
- It should not be done in people who are already hypermobile.
- People who have any major disease condition.
- People who have inflamed joints.
Goals of Active Range of Motion Exercises:

- To maintain physiological elasticity and contractility of muscles.
- To provide feedback from contracting muscles For.
- To provide stimuli to the integrity of bone and joint tissue.
- To increase circulation and prevent thrombus formation.
- To develop coordination and motor skills for activities.
Goals of Passive Range of Motion Exercises of Motion Exercises):
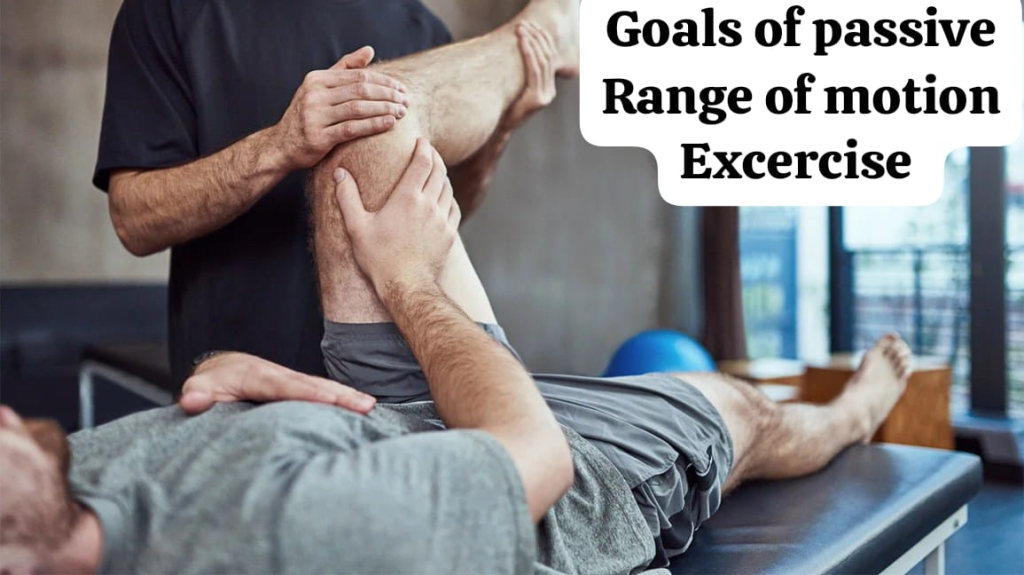
- To maintain mobility of joints and connective tissues.
- To minimize the formation of contractures.
- To maintain the mechanical elasticity of muscles.
- To improve circulation.
- To improve the movement of synovial.
- To inhibit pain.
- To improve healing after any injury or surgery.
- To bring awareness to the moment in the patient.
Guidelines and precautions:
- It is necessary to warm up the muscles before stretching them vigorously.
- Care should be taken while stretching the muscles around the painful joint.
- Care should be taken while stretching in patients who have osteoporosis or suspected osteoporosis and in patients who are on bed rest for a long time.
- Stretching should be done at least three times a week and a maximum of five to six times.
- Care should be taken while stretching in the elderly as their collagen has lost its elasticity and they also have less capillary blood supply.
- To increase flexibility, the muscles should be overloaded and stretched beyond their elastic range of motion.
- The ligaments and capsules surrounding the joint should not be overstretched.
- Ballistic stretching should only be done by patients who are already flexible.
- Frail integumentary wall patients should be careful while stretching.
Principles and Procedures for “ROM”:
The necessary equipment should be kept ready.
Examination, Evaluation and Treatment Planning:
Examine and evaluate the patient’s impairment and level of function.
Assess whether the patient has any pre-existing conditions.
Assess the patient’s ability to perform ROM (range of motion exercises).
Assess what types of exercises the patient is able to do.
ACTIVE RANGE OF MOTION EXERCISE (AROM) OR PASSIVE RANGE OF MOTION( PROM) EXERCISE.
- Assess the patient’s range of motion.
- Assess the patient’s general condition.
- Assess the patient’s vital signs.
- Assess the patient for any warmth or abnormal color.
- Documentation.
- Re-evaluation.
Patient Preparation:
- Communicating with the patient.
- Explaining the complete procedure to the patient.
- Do not ask the patient to wear tight clothing.
- Provide a comfortable position for the patient.
- Health care personnel should also adopt proper positions.
Active Range of Motion Exercises:
Active range of motion exercises help improve joint function.
Range of motion exercises help joints move properly and increase muscle strength.
Moving makes the joints flexible, reduces pain levels, and improves balance and strength.
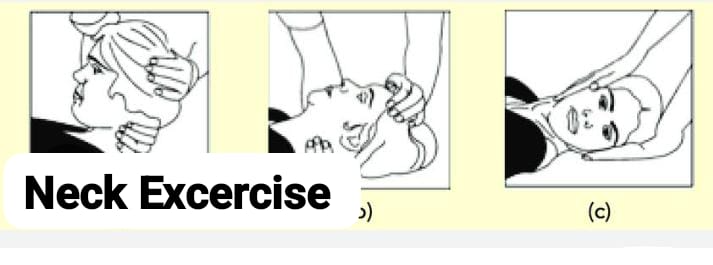
1)explain the neck exercise:
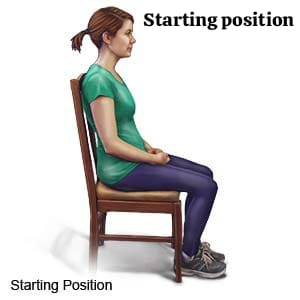
- Sit or stand before doing neck exercises.
- Face forward and keep both shoulders straight and relaxed.
Head tilts forward and backward :
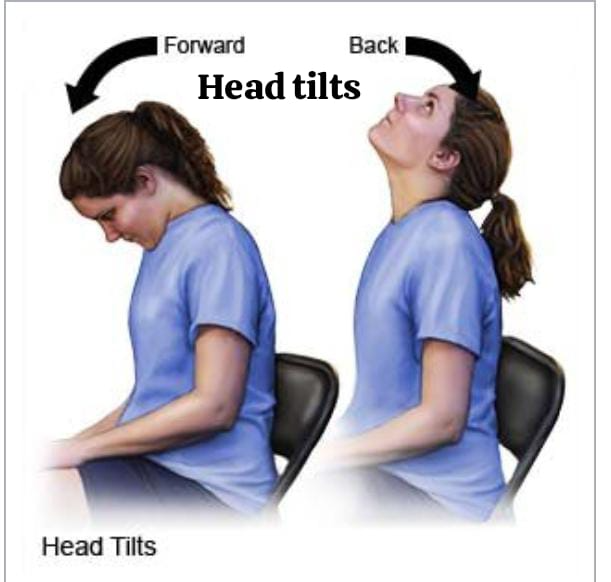
- In this, bring the head forward and try to touch the chest through the chin.
- Then bring the head back and as far as it is comfortable, backward Keep.
- Then bring the head back to the normal starting position.
HEAD TILT SIDE TO SIDE:
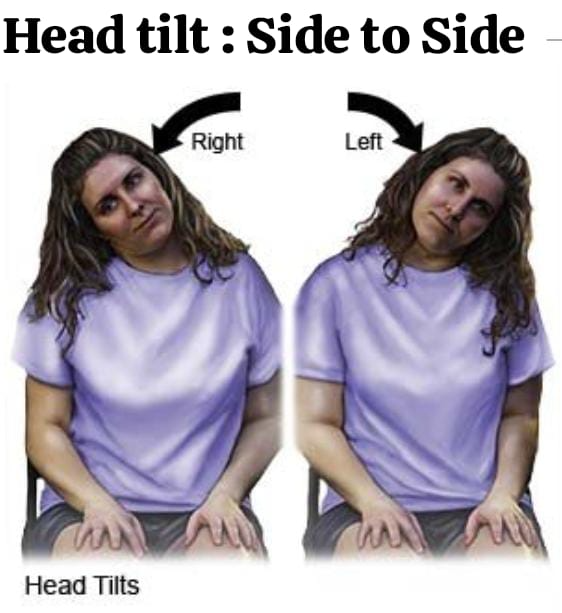
- In this, turn the head from side to side and try to bring the ear up to the solder and do this procedure on both sides.
- Then bring the head back to the normal position.
HEAD TURNS:
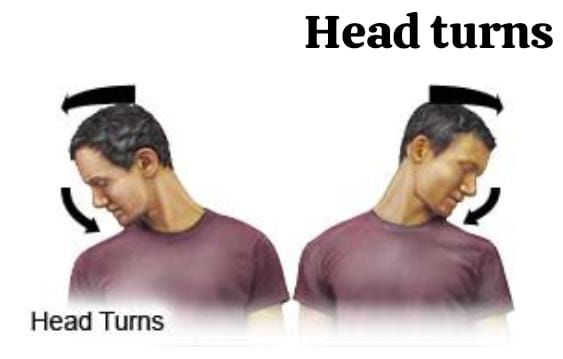
- Head turned Try to bring it towards the solder.
- Then touch the solder through the chin but do not raise the solder to touch the chin.
- Do this procedure on both sides.
- Then come to the normal position.
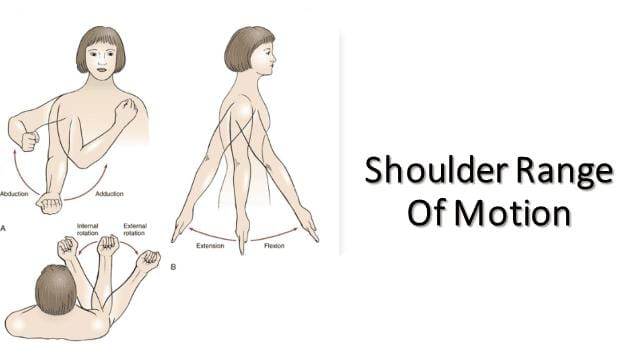
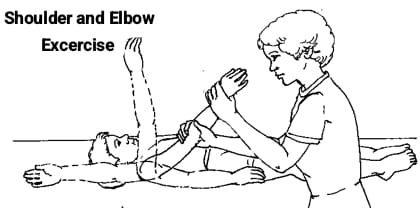
2) explain shoulder and elbow exercise:
- Stand or sit
- Yours with both hands Keep your palms facing your body.
- The palms should be facing your body.
shoulder movement up and down:
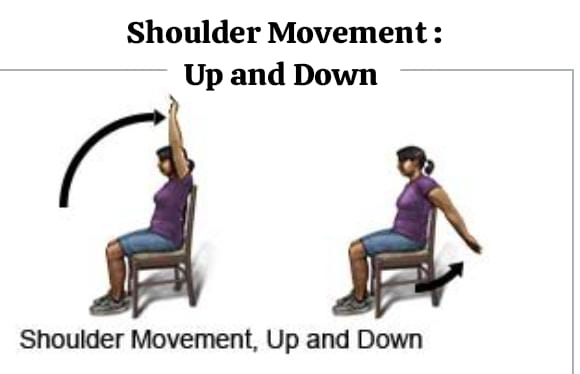
- Raise both arms forward and then over the head.
- Try to raise them so that the inner arm can touch the ear.
- Then bring both arms back down and keep the arms behind the body as much as possible.
- Then keep the arms back to their normal position.
Explain the shoulder movement side to side :
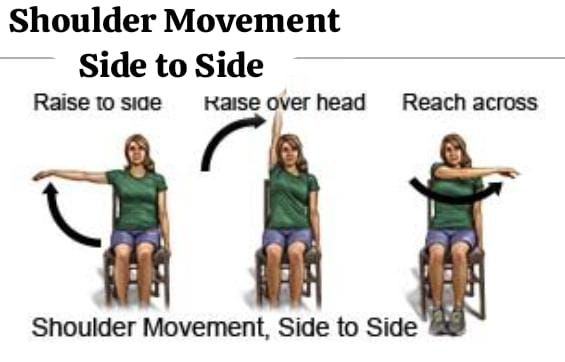
- Raise both the person’s arms and then keep both the arms above the head as high as possible. Then bring the arms back to the side, then bring the arms to the front of the body and bring the arms opposite each other to the solder, then bring the arms back to their normal position.
shoulder rotation:
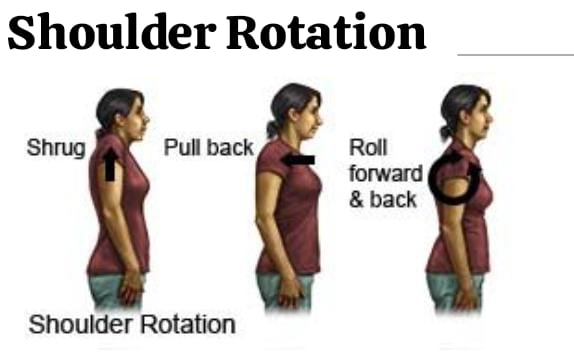
- Raise both your shoulders towards your ears.
- As if you were trying to shrug.
- Then lower them back to the starting position.
- Then let the solder rest. Pull your solder back and then let it rest again.
- Then rotate the solder in a simple circle and then rotate the solder back in the opposite direction.
HEAD TURNS:
- Head turned Try to bring it towards the solder.
- Then touch the solder through the chin but do not raise the solder to touch the chin.
- Do this procedure on both sides.
- Then come to the normal position.
2) explain shoulder and elbow exercise:
- Stand or sit
- Yours with both hands Keep your palms facing your body.
- The palms should be facing your body.
shoulder movement up and down:
- Raise both arms forward and then over the head.
- Try to raise them so that the inner arm can touch the ear.
- Then bring both arms back down and keep the arms behind the body as much as possible.
- Then keep the arms back to their normal position.
Explain the shoulder movement side to side :
- Raise both the person’s arms and then keep both the arms above the head as high as possible. Then bring the arms back to the side, then bring the arms to the front of the body and bring the arms opposite each other to the solder, then bring the arms back to their normal position.
shoulder rotation:
Elbow bent:
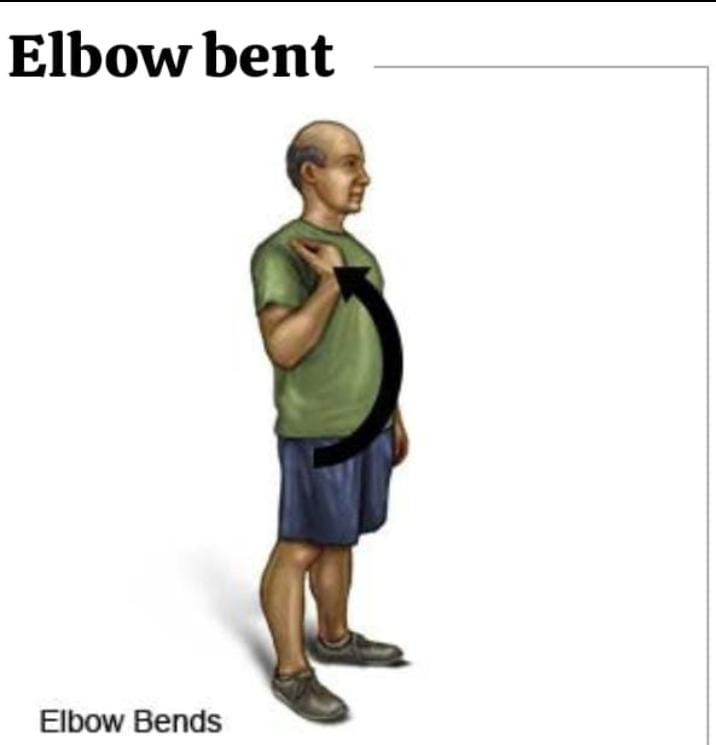
- Elbows bent Bend then try to touch the solder with the finger tip and bring the hand back to the normal position.
3)Arm and wrist exercise:
- Sit quietly, then bend the elbows and place both hands on a flat surface such as a table or lap and make sure that both wrists hang loosely.
wrist bends:
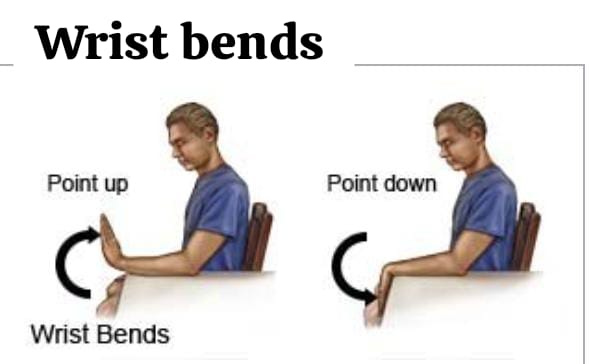
- Both of you Bend your wrist back so that your fingers are pointing towards the ceiling. Then bend your hand downward so that your fingers are pointing towards the floor.
wrist rotation:
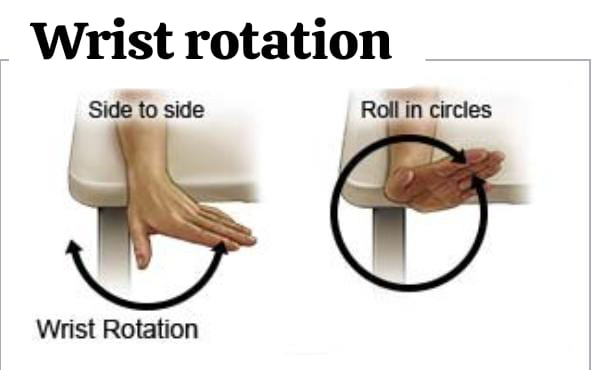
- Move your hand from one side to the other.
- Then rotate your hand in a circle in one direction, then rotate your hand in a circle in the other direction.
palm up , palm down:
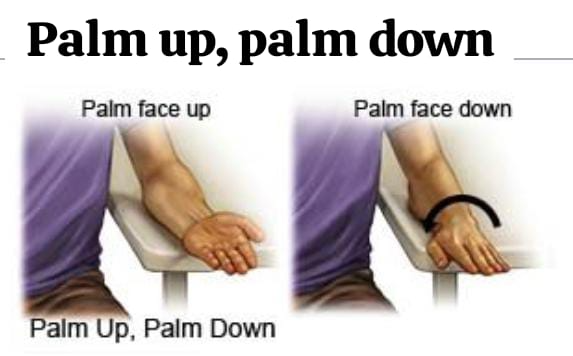
- Stay in the same position.
- But tuck the bent elbow forward towards your side.
- Then lower the palm and turn the palm so that it faces the ceiling, then turn the palm so that its face is facing downwards.
4)Hand and finger exercise:
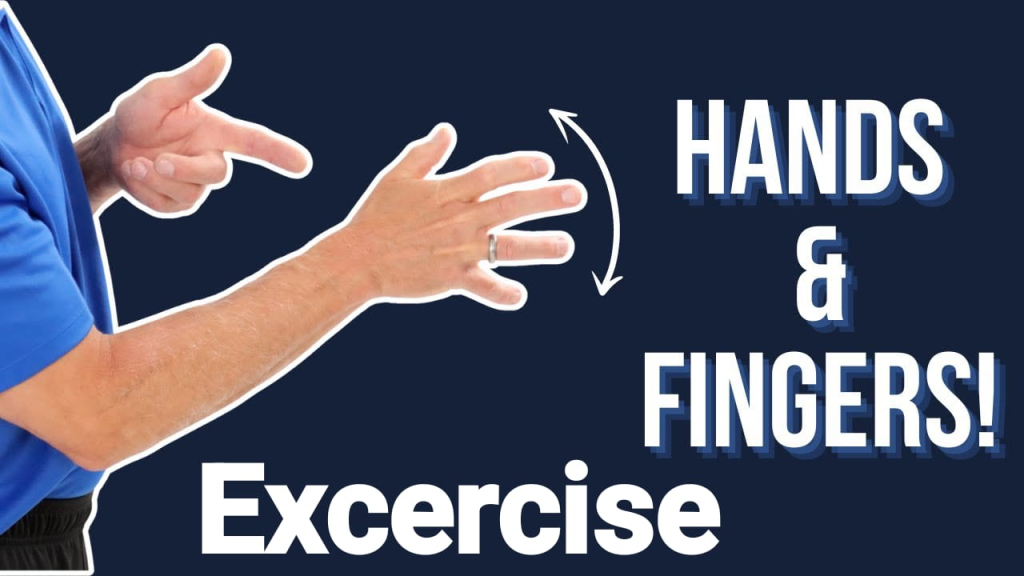
- Sit or stand and then place your hand in front of you.
Finger bends:
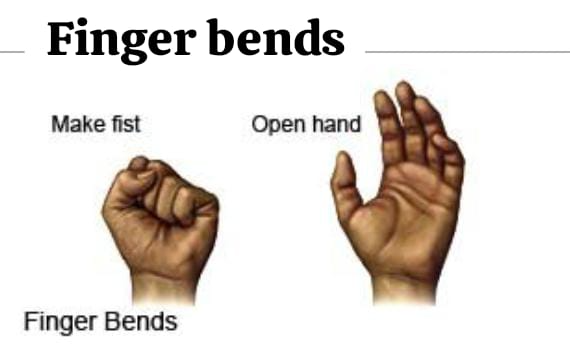
- Make a very tight fist and then open it and relax the hand.
Finger spread:
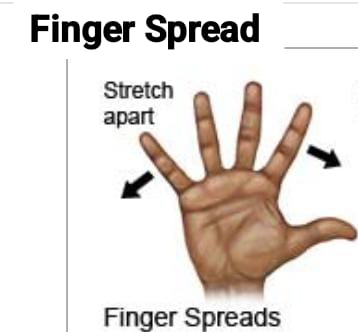
- Open the hand and then stretch the fingers as far as possible.
- Bring the fingers back to their normal position.
Finger to thumb:
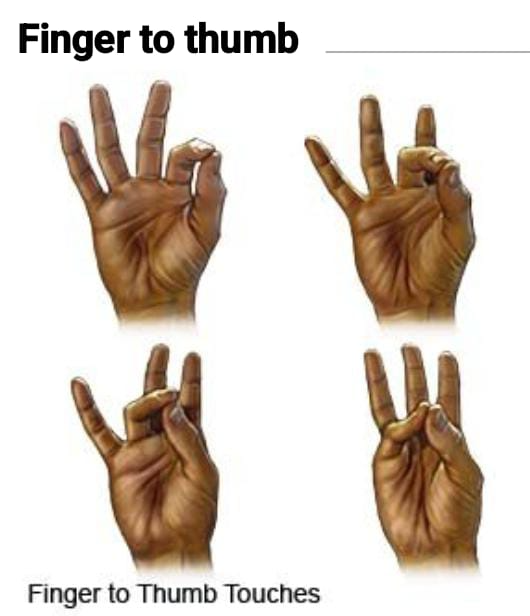
- To touch the fingers one by one with the thumb.
Thumb to palm:
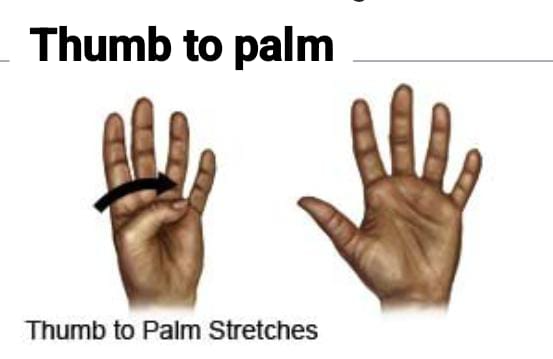
- Touch palm by thumb To do.
5)Hip and knee excercise:
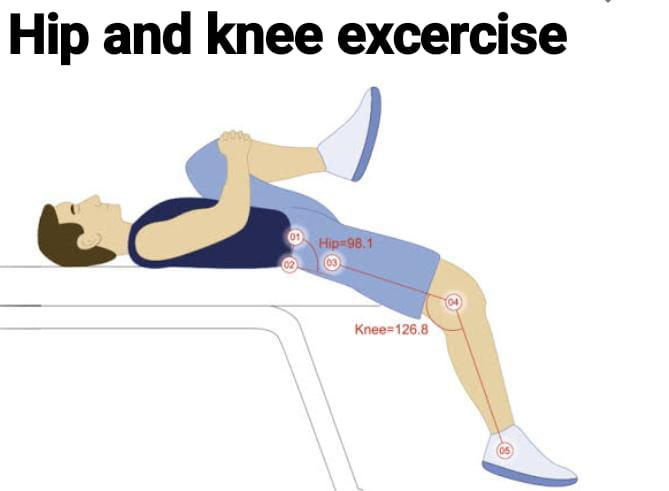
- If a person has a hip injury or surgery, then hip exercises are done.
Hip and knee bends:

- Point your toe.
- Then bend the knee towards the chest.
- Then straighten the leg back and place it back in a flat position on the bed.
leg lifts:
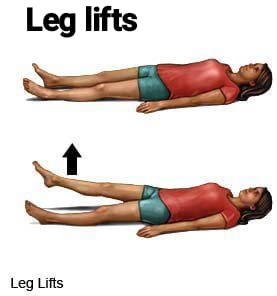
- Lift the leg, then let it stay in the air and then lower it back down. To raise the bed above the normal position.
leg movement side to side:
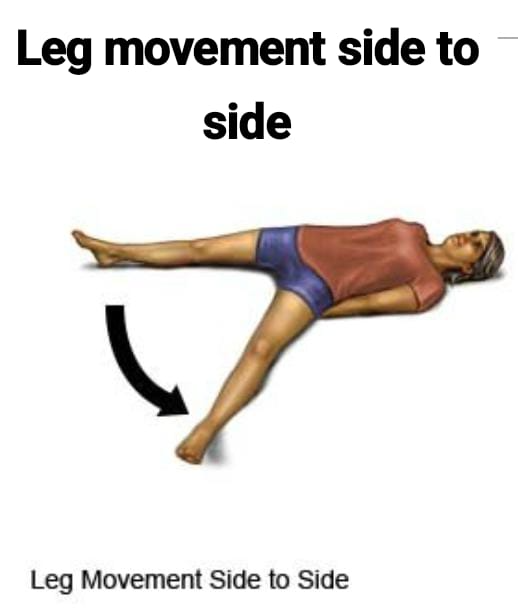
- Flex your leg and then position your toes so that the point is pointing towards the ceiling.
- Then move your leg from side to side and return the leg to its normal position.
leg rotation in and out:
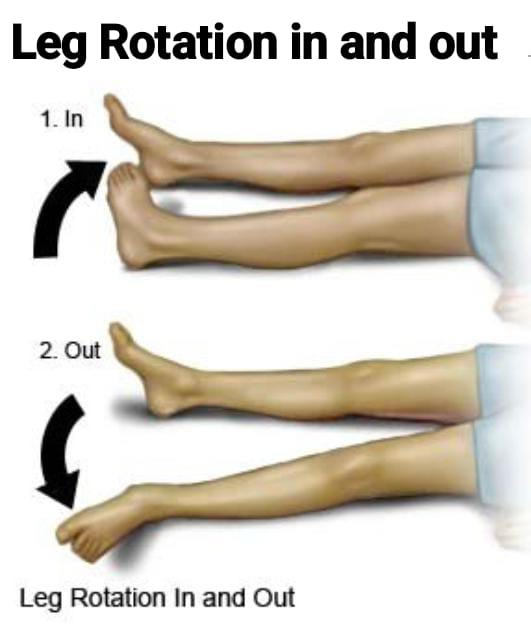
- Keep your feet on the bed and then roll the feet inwards so that the big toe touches the bed and then roll the feet outwards so that the smallest toe touches the bed.
knee rotation in and out:
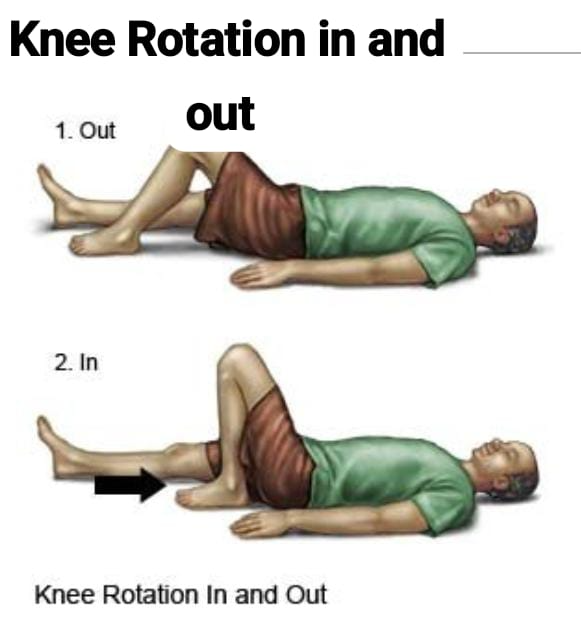
- Lie down on the bed.
- Then bend the foot and the band.
- Bend the band in such a way that the soles of the feet touch the bed.
- Then rotate the knee and then bring the foot back to its normal position.
6) Ankle and foot exercise:
- To sit comfortably.
Ankle bends:
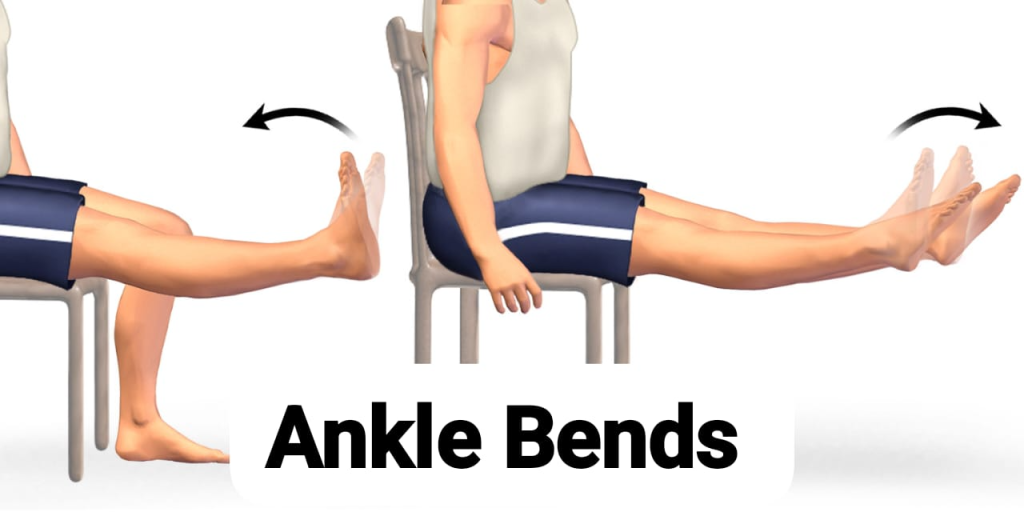
- Keep your toes on the floor and raise the heel of your foot.
- Then bring the heel back to the normal position and keep it on the floor and raise the toes.
Ankle rotation:

Take your foot slightly off the floor and then roll the ankle in a circular motion and then roll it in the opposite direction.
toe bends:
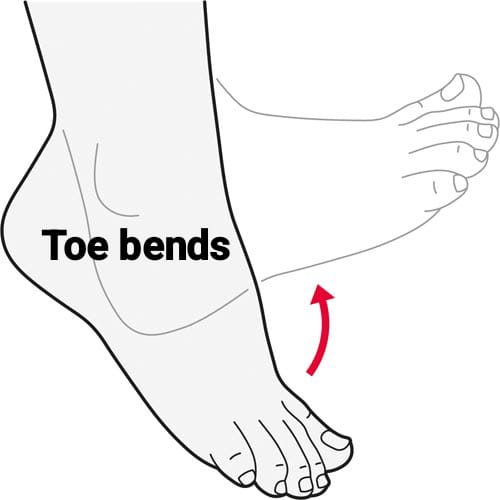
Rest your toes towards the ground then straighten them towards the ceiling and return your foot to its normal position. Bring into position.
toe spread:

Spread your toes and then bring them together.
Passive Range of Motion Exercises:

- Passive range of motion exercises make a person’s joints flexible.
- Exercises make a person’s joints fully mobile.
1)Neck exercise:
Provide support to the patient’s head with your hands and then return the patient’s head to its normal position after each exercise.
Head turn:
Turn the patient’s head to one side and then turn it to the other side. and bring the head back to the normal position.
Head tilt:
In head tilt, turn the patient’s head towards the shoulder so that his head touches the shoulder and then turn the head back towards the other shoulder and bring the head back to the normal position.
chin to chest:
Turn the patient’s head towards China.
2)Shoulder and elbow exercise:
Support the patient’s shoulder with one hand and then provide support for the patient’s wrist with the other hand.
shoulder movement, up and down:
Raise the person’s arm forward and above the head, then return the arm to its normal position at the side.
shoulder movement, side to side:
Raise the person’s arm as high as possible and then return it to its normal position.
elbow bends:
Hold the person’s arm so that the palm is facing up, then bend the person’s arm and straighten it.
3)forearm and wrist exercise:
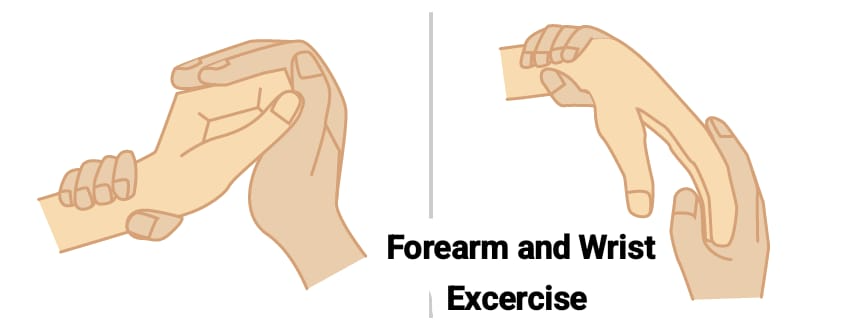
Provide support to the person’s wrist and hold their fingers as well Hold.
Wrist bends:
Bend the person’s hand so that his fingers are facing the ceiling, then bend his hand down so that his fingers are facing the floor.
wrist rotation:
Gently hold the person’s hand, then rotate his wrist in a circular motion and then back. Rotate it in the opposite direction.
Palm up and down:
Hold the person’s hand properly, then keep his palm facing the ceiling and then keep it facing downwards so that the palm touches the floor.
4)Hand and finger exercise:
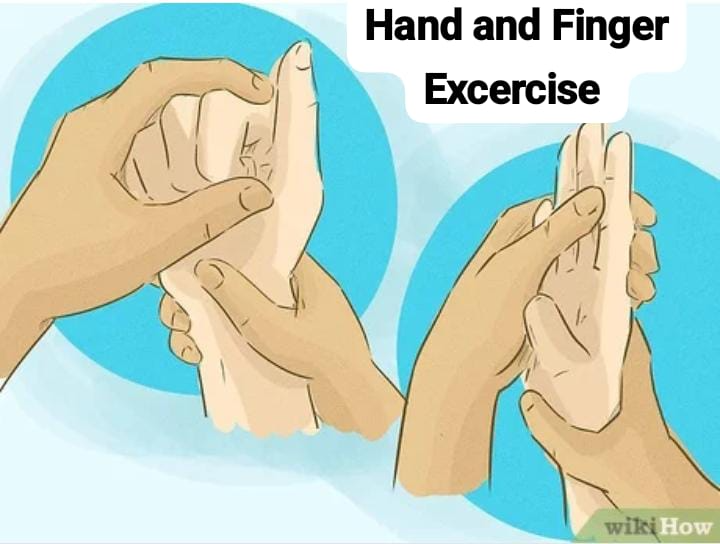
Hold the person’s hand with both of your hands.
finger bend:
Bend the person’s fingers and straighten them again, then bend and straighten each finger one by one.
finger spread:
In this, spread the thumb and the other finger and bring them to the normal position, then straighten the first finger and middle finger and bring them to the normal position, in this way straighten the fingers alternately and bring them to the normal position.
finger to thumb:
Touch the finger tip with the person’s thumb. Touch the thumb to each finger tip in turn and bring it to the normal position.
finger rotation:
In this, rotate the finger in one direction and then rotate it in the other direction.
Then rotate the thumb in one direction and then rotate it in the other direction, rotating all the fingers in turn.
5) Hip and knee exercise:
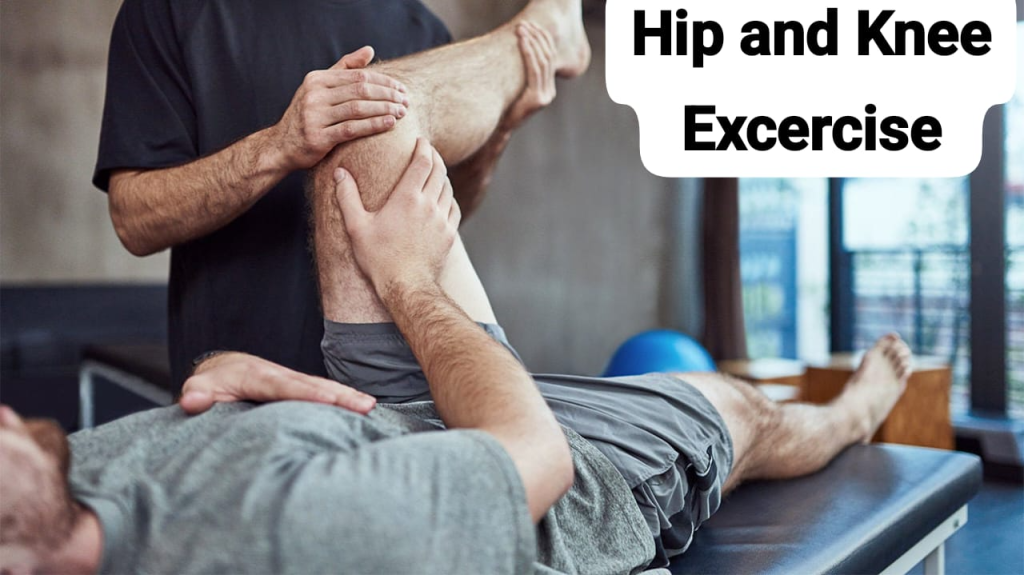
hip and knee bends:
Bend the knee and bring it towards the chest then bring it back to the normal position.
Leg movement:
In this, bring the leg from one leg to the other in the side direction and then bring the leg back to the middle position.
leg rotation:
The person brings one of his legs towards the other leg and then takes it out.
6)Ankle and foot exercise:
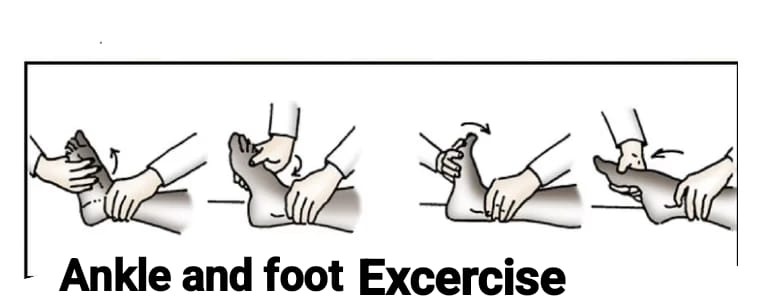
Ankle bends:
In this To bend a person’s leg and bend his foot in such a way that his toes are pointing towards the ceiling, then bend it back in the other direction so that his toes are pointed.
Ankle rotation:
Ankle rotation involves rotating the person’s ankle in one direction and then rotating it in the other direction.
EXPLAIN THE TRACTION (Explanation of traction) do)

- Traction is a type of force that is applied in a specific direction.
- Traction is a type of force that is provided to reduce a fracture (positioning bone fragments in correct alignment) and forcefully pull a body part, reduce the moment, and relieve pain.
- Traction immobilizes the fractured part and helps reduce deformity.
- In this, weight is applied to the affected limb, in which Ropes, pulleys are used to apply weight.
- Counter traction is a type of traction in which force is applied in the opposite direction and the fractured body part is brought to the normal position.
explain the purpose of traction:=(Write the purpose of traction.)
- To immobilize a fracture.
- To reduce deformity.
- To maintain the length and alignment of the injured extremity normal.
- To reduce or eliminate muscle spasm.
- To prevent deformity.
- To reduce muscle contracture.
- To reduce pain.
explaine the principle of traction.
- When traction is applied, counter traction works as an effective traction that causes the joint to return to its normal position.
- The traction applied should not be rested on the bed or floor, but should be allowed to hang freely.
- Traction is mainly responsible for immobilizing the fracture in the body.
- ropes should not be obstructed.
- If continuous traction is to be applied, do not remove the weight.
- The patient’s body alignment should be good. Keep.
- Keep the patient in the center of the bed when applying traction.
explaine the type of traction. (Describe the type of traction.)
1) Balanced suspension traction.
- In this traction, the affected body part is pulled in the opposite direction and support is provided by a splint.
- And weight is applied to prevent moment and immobilization. Can be done.
2)Running traction: =
- In this traction, direct force is applied and the body part is placed on the bed, then direct pulling force is provided without applying a splint so that the body part can remain balanced.
Ex:=Buck extension, pelvic traction.
3)continues traction:=
- Continuous traction is applied continuously.
- It is used to prevent certain types of fractures and dislocations.
- It is mainly applied for the management of fractures.
4)intermittent traction:=
- Intermittent traction is applied at short intervals and is mainly used for people who have muscle spasms.
5)manually traction:=
- Manual traction is mainly applied manually.
- And this is mainly by hand and for a temporary period.
6)explain the skin traction.
- Skin traction is applied directly to the skin.
- Skin traction mainly involves the application of tape, sponge, rubber, or special devices such as boots, cervical halters, and pelvic belts that come into contact with the skin.
- And the force applied in this is transmitted directly to the musculoskeletal structure.
- Skin traction is mainly a temporary measure for people who have muscle spasm or pain.
- This is mainly used before surgery for hip fractures and femoral shaft fractures.
- And this is mainly used to treat fractures in children.
nursing consideration
- To ensure that traction is effective or not.
- To see if the bandage applied over the traction is slipped or not.
- Maintain the proper position of the patient. The patient should be in the middle of the bed so that traction is more effective.
- The leg should be neutral to maintain the proper position.
- To maintain counter traction, there should be no wrinkling or slipping of the bandage.
- Avoid moving the patient so that the traction does not move.
- Limit the mobility of the patient to whom traction is applied.
- Provide proper psychological support to the patient.
- The color of the body part on which traction is applied, its temperature, its Check pulse or screen integrity and ED conditions.
- And check the patient for any other problems including pressure sores, constipation, urinary tract infection, loss of appetite, lung congestion, and screen breakdown.
- Closely monitor skin breakdown.
- Provide back care to the patient every two hours and use air and water mattresses to prevent pressure ulcers.
7)Skeletal traction:=
- Mainly used for fractures of the femur bone, tibia, and cervical spine.
- In this, traction is applied by an orthopedic surgeon while maintaining aseptic technique and wire pins and tongues are placed in the bone.
Nursing consideration:=
- When providing skeletal traction, an adequate amount of weight should be provided.
- When applying traction, the patient should have good body alignment and the patient should be in a proper position so that the foot does not drop.
- Anything on the side where traction is being applied should be Check for redness, swelling, warmth, drainage, etc.
- Continuously monitor the patient’s neurovascular status for signs of impaired blood flow.
- Check that the equipment is functioning properly.
- Check the skin integrity at the pressure points.
- Maintain traction properly.
- Nothing should be touched under the traction applied and it should be allowed to hang freely.
Traction apparatus:=
- Weight,ropes,
- Pulleys, spreader bars,footplate,
- Trapeze,hammocks,slings,and halter.
complication
- infection of skin.
- skin break down.
- stasis pneumonia.
- thromboplebitis.
- pressure ulcer.
- urinary infection.
- constipation.
explain the nursing management of patients with traction.
1)minimizing the effect of immobility.
- Advise the patient to do regular exercise to maintain joint strength and function.
- Ask the patient to do deep breathing exercises.
- Auscultate the lungs sound twice a day.
- Ask the patient to take fluid intake.
- Ask the patient to take a high-fiber diet.
- Provide the patient with stool softeners and enemas.
- Check whether the patient has thrombophlebitis.
2) Avoiding infection at pin site.
- Assess whether there is any pressure sore on the side of the bony prominence.
- Assess whether there is any skin irritation.
- Release pressure to a small extent.
- Check whether there is a burning sensation at the site where traction is applied.
- Check whether linen and clothing are wrinkle-free.
- Continuously check the patient’s vital signs.
- Immobilize the site where traction is applied.
- Check for any other signs of infection.
3) promoting tissues perfusion .
- Assess the patient’s motor sensory function.
- Check the patient’s sensation level.
- The patient’s neurovascular status assess.
- Prevent pressure ulcers by using protective devices.
- nurse should auscultate the patient’s lung sound.
General care of patient with traction.
- Assess the patient’s neurovascular status.
- Check the patient for pain sensation, active and passive range of motion exercises, skin colour, joint motion temperature, capillary refill time, numbness, and coldness.
- Check the patient’s skin area.
- Apply sufficient amount to the patient.
- Instruct the patient to do regular exercise, deep breathing, and wearing elastic stockings.
- Repeatedly assess the area where traction has been applied to see if there is any line in the tendon.
- Keep the patient in a neutral position.
- Provide the patient with a comfortable and functional position.
explain orthopedic splint
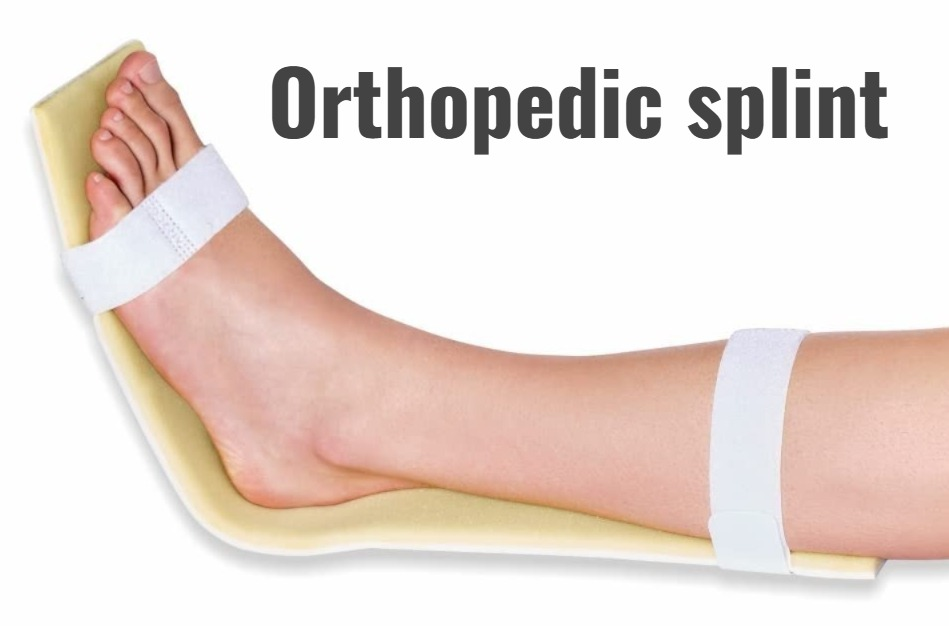
- A splint is a device that is used to support and immobilize an extremity or spinal cord.
- A splint is used in many situations, including temporary immobilization of a broken bone, damaged joint, and support for a joint during activities.
- A splint is a device that is used to immobilize an injured body part. It is used to provide support.
Ex:= broken bone, muscles sprain ,
Splint is used to provide support after surgery. - Splint is very padded due to which pressure can be prevented and skin break down can be prevented.
- Splint is mainly used in such conditions in which rigid immobilisation is not required.
explain the purpose of splint. (Describe the purpose of a splint.)
- To prevent movement of the injured extremity.
- To prevent further injury.
- To reduce oedema.
- To reduce pain.
- To maintain joint alignment For.
- To prevent contracture.
- A splint is used to support, protect, and immobilize the joint.
- To stabilize the joint if there is any ligament injury.
- To maintain the range of motion of the joint.
- To correct deformity For.
- To maintain tissue elongation (expansion).
- To stabilize and rest the joint if there is any ligamentous injury.
- To promote wound healing.
- To relieve pressure points.
- To protect a graft if it has been placed.
- To correct deformity.
- To strengthen the muscles.
- To support and immobilize the joint after an operation until healing is complete.
explain the indication for splinting.
- fracture, acute artheritis, suppuration,
- severe lacerations and abrasion,
- joint infection,
- skin A laceration,
- tenosynovitis (inflammation of tendon),
- puncture wound,
- laceration over joint puncture wound,
- reduced joint dislocation.
- Animal bites of hands or feet.
explain the contraindication of splint.
- compartment syndrome ( compartment syndrome := an increase pressure in side the muscles which restrict blood flow and cause pain).
- skin that is at high risk of infection.
- need for open reduction.
- open Fracture.
- Chronic neuropathy (nerve damage).
- Active infection.
explain the type of splint
Splints come in many shapes and sizes.
Splints come in many shapes and sizes.
Ex:= buddy taping ( for finger injury),
Some types of splints are large and are used to provide support to the hip and thigh.
Some splints are made of plastic and fabric.
These splints are fitted with hooks or buckles.
type of splint (type of splint) )
- 1)soft splint (soft splint).
- 2) hard splint (hard splint).
- 3)air/vacuum splint (air or vacuum splint).
- 4)Traction splint (traction splint).
1)Soft splint.
- This splint is mainly provided at home or by an emergency medical provider.
- This is a type of simple splint that is provided using a pillow or blanket.
- This splint is secured around the injured area and tied with tape. is.
- Soft splints are mainly provided for support and comfort of the injured extremity.
2) Hard splint.
- Hard splints are mainly used for injured extremities.
- Hard splints are provided using cardboard and padded boards.
- Some types of hard splints are made of fingerglass or plaster to support the patient’s extremities.
- The splint used for thumb injuries is called a thumb spica.
- Volar splint is used for wrist and forearm injuries.
- Boxer splint is used for hand and fist injuries.
- Pre-fabricated aluminum splints are mainly used to stabilize the finger.
3)air/vacuum splint (air or vacuum splint).
- Air splints are mainly used to provide support for orthopedic injuries.
- Air or vacuum splints are mainly used to provide comfort to injured extremities.
4)Traction splint (Traction splint) .
- Traction splints are used primarily to reduce the amount of deformity, align the bone, provide traction, and prevent the bone from moving.
- Track splints are used primarily to align the femur bone or the midshaft of the lower leg.
Explain the nursing care of a patient with a splint. Describe.)
- Check the skin where the splint is applied for any cracks, damage, swelling or soreness.
- Keep the area where the splint is applied dry and clean.
- Keep the area where the splint is applied properly padded to prevent cracks and skin breakdown.
- Keep the area where the splint is applied properly padded to prevent cracks and skin breakdown.
- When a splint is applied and bathing is to be done, wrap the splint properly with plastic. So that the splint can be prevented from getting wet.
- Apply a soft pad to the area where the splint is applied and if there are bony prominences, apply it to that area.
- Check that blood vessels or nerves are not compressed in the area where the splint is applied.
- Keep the splint properly clean.
- Provide support to the injured area.
- Elevate the affected limb and prevent swelling.
- Loosen the elastic bandage.
- Do not apply powder or deodorant to the skin, as this may increase itching.
- Do not try to crack the skin with a sharp object inside the hard splint, as this may cause cuts to the skin.
- Apply a pad to the skin to protect the skin.
- Perform range of motion exercises.
- And provide support to the patient.
explain pop application and removal
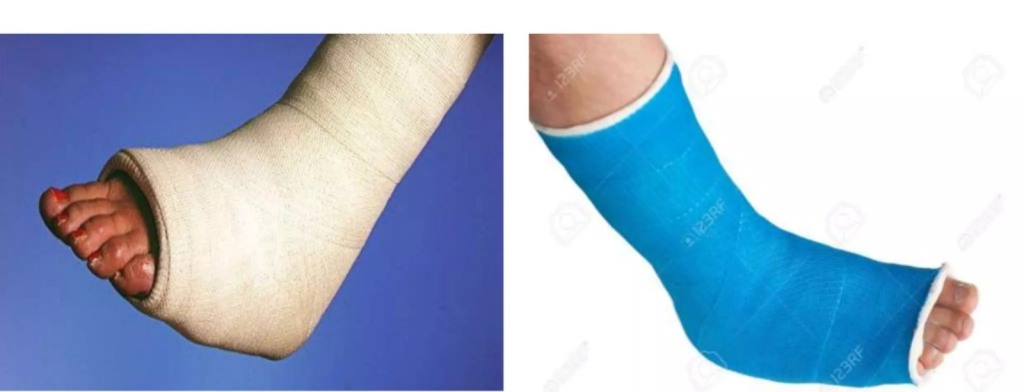
1) explain the plaster cast (Explain the plaster cast.)

- A cast is a rigid device that is applied to immobilize injured bone and soft tissue and promote healing.
- A cast is primarily applied to immobilize the bone above and below a fractured bone.
- A cast is essentially a supporting bandage that is solid and is wrapped around an extremity.
explain the purpose of cast
- To support and protect bones and soft tissues.
- To reduce pain.
- To reduce swelling and muscle spasm.
- To immobilize a broken bone.
explain the casting material
1) plaster cast
- Plaster of Paris bandages are rolls of precut crinoline that come in a variety of sizes.
- And the plaster is also attached to it.
- The bandage rolls are easily applied to the body by dipping them in cold water.
- Then a crystallization reaction occurs and heat is generated.
- Then it is exposed to air to dry. is.
- Then it cools down after about 15 to 20 minutes.
- Plaster cast takes 24 to 72 hours to dry completely.
- Plaster cast is heavy and dries slowly.
2) fiberglass cast( Fiberglass Cast):=
- This water is made of activated polyurethane which has the versatility of plaster.
- It is light in weight, dries quickly, is strong, water resistant and durable.
- It has pores, so skin problems can also be prevented.
- If this gets wet, it must be dried to prevent skin breakdown.
- Fiberglass and plastic casts are generally expensive and also macerate the skin.
- Cotton and other synthetic materials are used to make the inside of the cast, which makes the inside soft and acts as padding that provides softness around bony areas, such as the wrist or elbow.
- Some types of special waterproof casts are used to prevent the plaster cast from getting wet and prevent screen problems.
explain the type of cast
1)short arm cast:=
- Short arm cast is mainly applied from elbow to thumb and is mainly used when there is a radius, humerus, carpal, metacarpal fracture.
2)long arm cast:=
- Long arm cast is mainly used from the axillary area to the palmar crease of the hand and is mainly used to treat fractures of the upper extremity.
3)short leg cast:=
- Short leg cast is applied from the bottom of the knee to the base of the toe.
- Short leg cast is mainly used to treat fractures of the tibia, fibula, ankle.
4)long leg cast:=
- Long leg cast is mainly applied from the base of the thigh. It is applied from the base of the toe.
- And this cast is mainly used to treat fractures of the femur, tibia and fibula.
5)walking cast:=
- Short and long leg casts are mainly used as weight bearing.
6) body cast:=
- This cast is applied around the trunk.
7) shoulder spica cast:=
- This cast is It is mainly used to enclose the trunk, ankle and elbow and is mainly used to treat ankle fractures.
8) Hip spica cast:=
- This cast is mainly applied from the middle of the trunk to the foot and is mainly used to treat hip fractures.
explain preparation of patients for plaster cast:=
- Explain the procedure to the patient.
- Assess the patient’s general health.
- Check the patient’s vital signs.
- Properly prepare the area where the plaster cast is to be applied. Shaving.
- Pay special attention to the skin and bony areas.
- Plaster bandage mainly depends on the size and number of bone fractures.
- Take proper consultation before applying plaster cast.
- Explain the procedure completely.
- Clean the affected area properly with a shop solution.
- Gentally scrub.
- Remove any tight clothes and ornaments.
- Ask the patient to sit comfortably.
- Apply pads properly to the pressure points.
explain the nursing management of patients explain the assessment of patient
- Check the extremity where the cast is applied.
- Check whether there is circulation in the area where the cast is applied.
- Check whether there is warmth in the area where the cast is applied.
- Check whether there is sensation in the area where the cast is applied. To do.
- Assess whether the affected limb has motor ability.
- Check whether the site on which the cast is applied is too tight.
- Assess skin integrity.
Explain the nursing interventions
- Elevate the affected extremity to stimulate circulation.
- Change the patient’s position frequently while the cast is being applied.
- Provide support to the foot to prevent foot drop while the splint is being applied.
- If the patient is experiencing pain over the bony prominence area, Check the area where the pressure bony part is.
- Assess the patient’s neurovascular function.
- Check the patient’s body circulation and movement of his extremities.
- Ask the patient to moment the body parts.
- Check the patient for any complications such as compartment syndrome, pressure ulcers or tissue damage.
- Instruct the patient to follow a well-balanced diet, including a high-fiber diet that prevents constipation.
- Instruct the patient to drink adequate amounts of fluid.
- Instruct the patient to avoid gas-forming foods while the cast is in place.
Nursing care
1)keep the cast dry:=
- Keep the cast completely dry and when washing the body part, protect it with plastic so that the cast is not exposed to water.
2) Watch the cast carefully:=
- Check the area where the cast is applied for any redness, skin breakdown, or bluish discolouration. To do.
3) elevate the cast:=
- Elevate the affected extremities to prevent swelling.
4)exercise the extremity:=
- Properly exercise the affected extremity.
5)Apply an ice bag to the cast:=
- Apply an ice pack to the area where there is swelling to reduce swelling.
6)Instruct the doctors if the following conditions occur:=
- When the body temperature is above 101°f.
- When the pain level increases.
- When the swelling increases.
- Numbness or tingling sensation.
- When there is any foul smell coming from the cast.
- When the toes are cool.
explain the nursing care after removal of plaster
- Plaster is mainly cut using electric plaster cutter and manual plaster cutter.
- After removing the plaster, wash it thoroughly and then dry it properly and do not wipe the affected extremity forcefully, due to which there is a possibility of peeling of the skin.
- How to wear the plaster so that oedema can be prevented.
- After removing the plaster, it Advise the patient not to rub or scratch the area.
- Instruct the patient to elevate the affected area to prevent swelling after the cast is removed.
- Instruct the patient to ambulate properly after the cast is removed.
- If the patient has been instructed by the physician to wear compression bandages and elastic stockings, wear them properly.
complication of cast
1)compartment syndrome
- Compartment syndrome is a syndrome in which the blood supply is impeded and the circulation is cut off at that place and swelling occurs on the affected area.
- And pain occurs on the affected area.
2)Pressure ulcer:=
- Ulcers develop on the bony prominences where the cast is applied.
- Conditions like skin breakdown, redness, warmth, swelling are also seen in the area where the cast is applied.
explain the health education to patient and relative. (Provide health education to patient and relative)
- Do not place any object on the cast that has been applied.
- If the cast is made of plaster of Paris, do not let it get wet.
- If fiberglass If the cast is applied, dry it properly if it is wet.
- Instruct the patient not to walk on wet and slippery surfaces.
- Do the prescribed exercises regularly.
- Elevate the area where the cast is applied to prevent swelling.
- Avoid scratching the skin inside the cast, as this can lead to skin breakdown.
- Do not insert any object inside the cast.
- If there is pain, swelling, or redness in the area where the cast is applied, report it to the physician immediately.
- If the cast breaks down for any reason, inform the physician immediately.
1)explain the definition of neurogenic bladder .
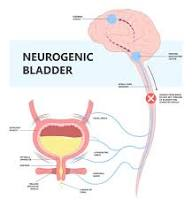
- Neurogenic bladder is a type of neurogenic dysfunction.
- Neurogenic bladder is a dysfunction of the urinary bladder, which is mainly caused by problems in the central and peripheral nervous system.
- Neurogenic bladder is mainly caused by impairment in the normal nerve pathways.
- Neurogenic bladder can cause urinary retention, incontinence of urine, urinary tract infection, stone formation, renal failure Conditions like this arise.
2) Explain the type of neurogenic bladder. (Write the type of neurogenic bladder.)
- 1) flassid neurogenic bladder ( flaccid neurogenic bladder).
- 2)spastic neurogenic bladder ( spastic neurogenic bladder.)
1) flassid neurogenic bladder ( flaccid neurogenic bladder).
- Flaccid bladder is mainly seen due to motor neuron lesion and any trauma.
- Due to the decrease in the sensation of bladder feeling, the bladder does not concentrate fully and due to this the bladder becomes full.
- And the bladder becomes distended due to which urinary incontinence is seen.
2)Spastic neurogenic bladder
- Spastic bladder is mainly characterized by uncontrolled and frequent expulsion of urine from the bladder.
- This is mainly seen due to brain damage and spinal cord damage.
- Due to this, urine emptying becomes incomplete.
provide Etiology (Give reasons)
- Neurogenic blood vessels are found in any age.
- Alzheimer’s disease.
- Alcohol neuropathy.
- Stroke.
- Meningomyelocele.
- Aids.
- Parkinson’s disease.
- Brain or spinal cord tumor.
- Diabetic neuropathy.
- Spina bifida.
- Multiples Sclerosis.
- nerve damage.
- due to any diabetes or alcoholic disorder.
- due to injury to the spinal cord.
- due to nerve damage.
- Vitamin B12 deficiency.
Clinical manifestations:
- Excessive urine production.
- Bladder overactivity.
- Urinary incontinence.
- Frequent urination.
- Urinary retention.
- Urinary frequency and urgency
- Problems in expelling the entire urine from the bladder.
- The bladder becomes full and urine leaks.
- Loss of bladder control.
- Loss of sensation of bladder fullness.
- Pain and burning during urination.
- Erectile Dysfunction.
- Urinary Tract Infection.
Diagnostic Evolution (Diagnostic Evaluation):
- history tacking and physical examination
- complete Neurological examination.
- post void residual volume.
- renal ultrasonography.
- Serum creatinine.
- cytography.
- cytoscopy.
- cytometrography.
- urodynamic testing.
explain the treatment (Explain the treatment)
- Provide medicine that relaxes the bladder.
- Treat and control urinary tract infections.
- Advise to drink plenty of water to reduce urinary tract infections.
- Ambulate the patient frequently.
- Change the patient’s position frequently.
- Tell the patient to take calcium in small amounts.
- Change the patient’s position frequently.
explain specific treatment
- 1)physical-psychological therapy.
- 2)bladder evacuation.
- 3) electrical stimulatory therapy.
explain surgery
- 1) Transurethral resection of the bladder neck.
- 2)urethral dilatation.
- 3)External sphincterotomy.
- 4)urinary diversional procedure.
- 5)implantation of artificial sphincter.
- 6)urethral stent.
Nursing Management:
- Monitor residual urine.
- Monitor for signs and symptoms of any renal calculi.
- Assess urinary stasis.
- Check for signs and symptoms of urinary tract infection, including urine color, order, volume, frequency, urgency.
- Patient’s Check intake output.
- Administer vitamin C to the patient to produce acidic urine and prevent bacterial growth.
- Assess the patient’s voiding pattern.
- Ask the patient to do kiggle exercises.
- Provide different methods to empty the patient’s bladder like Crede’s method, Valsalva’s maneuver etc.
- Use aseptic technique and sterile method when catheterizing the patient.
- Prescribe drugs to maintain continence in the patient.
- Instruct the patient to have regular follow-up.
explain the use of orthopedic aasist device
1) Explain the crutches.
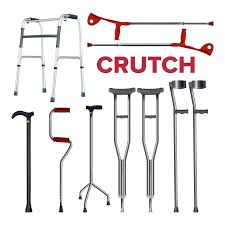
- Crutches are artificial devices that are used by patients who are unable to walk on their own.
- Crutches are mainly used to provide ambulation and independence to patients who have lower extremity injuries.
explain the indication
- disease, injury, birth defect.
explain the preparation for crutch walking
- Inform the client that he/she should wear well-fitted shoes.
- Before using crutches, ask the patient to stand on a chair and use the support of a chair to achieve balance. Can be done.
- The patient should stand against the wall and provide a neutral position.
- It is necessary to practice walking with crutches before starting.
- Explain the procedure to the patient.
- Ask the patient to wear full clothing and non-slippery shoes.
crouch walking gait
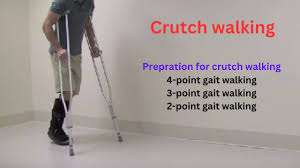
1)Explain four point gait:=
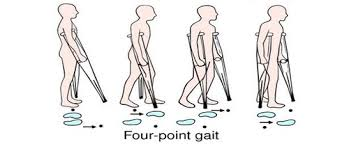
The four point gate is mainly used when a small amount of weight can be borne on both lower extremities.
- 1) First, forward the right crutches.
- 2) Then forward the left leg.
- 3) Then forward the left crutches. Do.
- 4) Then move the right foot forward.
- 5) Repeat in this way in a cruch-foot cruch-foot sequence.
2)three point gait:=
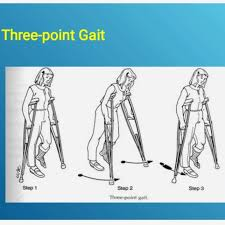
Three point gate is mainly used when some weight bearing is not possible.
- 1) In this, the affected leg (Non weight bearing) and both the crutches are moved forward.
- 2) Then the unaffected leg (weight bearing) to do it next.
- 3) Repeat in the same sequence.
3) Two point gait:=
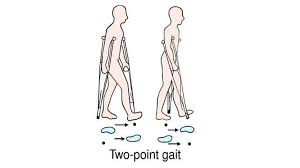
Two point gate is mainly used when a small amount of weight is to be borne above both lower extremities.
- 1) In this, the right leg and the left crutches are brought forward.
- 2) Then the left leg and the right crutches are brought forward.
- 3) Then repeat this sequence.
4)swing through gait:=

This is mainly used when the lower extremity is paralyzed.
- 1) In this, both the extremities are moved forward about six inches.
- 2) Then both the legs are moved forward six inches.
- 3) Then repeat in the same pattern.
explain walker and canes
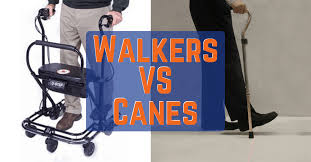
- Walkers and canes are primarily mobilisation aids that allow the patient to bear some weight on the affected leg but require some support.
- When a walker is used, the patient’s upper arm muscles and upper body are used for weight bearing.
- Then the following sequence should be used.
1) Grip the hand grip very tightly.
2) Then move the walker and the affected leg forward six inches.
3) Then bring the unaffected leg parallel to the affected leg.
4) Then repeat the same sequence.
explain the use of cane
Ask the patient to hold the unaffected side of the cane on the same side, six inches forward and six inches to the side of the foot, and then follow the sequence below.
1) Move the affected leg forward and move its parallel cane forward as well.
2)Then move the unaffected leg forward so that it is just a little behind the cane.
3) Then move the affected leg forward.
4) Then move the cane forward six inches.
5) Repeat this sequence.
If less support is needed, move both the cane and the affected leg forward together.
The walker and cane are used to provide support to the body part and to walk.