ENGLISH FIRST AID
FIRST AID
UNIT-1
What is First Aid?
Sudden Illness which is physical like Fracture, Bleeding or Burns, the person who is present at the time, can give treatment before the doctor comes i.e. First Aid.
Purposes for First Aid
1) Remove the person from the threatening situation
2) Pain Relief,
3) Save Life,
4) Obligation to see that the patient does not suffer from wound or illness,
5) Get medical help as soon as possible.
- Qualities of a First Aider.
It is not necessary to study scientific or medical line to give First Aid, anyone who can understand the principles of First Treatment is considered a suitable person. However, it must have certain qualities like,
(1) Self-confidence
(2) Remain calm in any situation –
(3) Sharp Observation power
(4) Know which injury to prioritize first.
(5) Keeping the crowd quiet
(6) Seeking help only from the gathered crowd
(7) To know the extent of one’s ability so as not to give false reassurance to loved ones.
(8) If the patient is dead. Even if you think so, it is wise to avoid saying it
(9) Suggestion of first aid
(10) Not bound by time.
- – Golden Rules of First Aid Treatment:-
The Golden Rules of First Aid Treatment are mainly as follows
(1) Preventing blood flow
2) Remove obstruction of respiration or give artificial respiration.
(3) To give courage and reassurance if the patient is conscious,
(4) Remove the patient from the dangerous situation
(5) To relieve pain
(6) Maintaining body temperature
(7) Fluid Replacement (Fluid Replacement)
(8) To try to relieve immediate symptoms etc.
If these points of first aid treatment are kept in mind, the person involved in the accident can do a lot for the person who is treated.
- Principles of First Aid Treatment
1) You should reach the place of accident as soon as possible
R) Do not ask unnecessary questions
3) Knowing the cause of injury or illness as soon as possible.
4) To quickly remove the thing that caused the injury or to remove the person from there. For example, if the person has been burnt, remove the person from there and pour water.
5) To check whether the patient is unconscious or semiconscious, alive or dead.
6) Suggestion of which treatment to do first: Like if the heart rate is stopped first, try to start it, make respiration regular or if bleeding is happening, try to stop it etc.
7) Getting Medical Treatment
8) Knowing and recording the details of the patient
9) Keeping the patient in a position where the wound is relieved
10) Arrange the necessary equipment from the present item, like using a handkerchief without waiting for the bandage if bleeding occurs.
11) Give assurance to the patient if he is conscious.
- Which First Aid Treatment can be given?
Accidents can happen anywhere and anytime like at home or on the road, at work or natural calamities, burns, electric shocks, scorpion or snake bites etc.
A person who knows First Aid is not always present at the accident site. At such a time, one should reach the place and quickly find out the details of the injury such as
1) When did the accident happen?
Q) How did it happen?
3) Is there any injury to the head or not?
4) Is the patient conscious or unconscious?
Get details about the patient’s condition or get it from the patient or from the person present.
It is easy to know the cause of injury from the patient’s complaint. Check patient’s Pulse, Respiration, Fikas, Bleeding, Fracture etc.
Pulse:- If the heart activity has stopped then the pulse stops. Which can be started by massaging the part of the heart (chest), if the pulse is weak and fast, there may be a possibility of bleeding, if the pulse is normal, assurance can be given to the patient with love.
Respiration :- Fast, slow or not. Fast respiration requires emergency treatment.
(Paleness) Fikash :– Paleness of eyes, tongue or nails is a sign of Wound Ray Bleeding.
(Bluish) Brownishness :– Brownishness of tongue, lips or nails indicates the need of Oxygen.
Bleeding:- To see if Blood comes from nose, ear, mouth or injured part or not.
Burns :- (Burns) can be known by seeing.
Poisoning:- It can be understood from the strange smell of poison or stains on clothes. Answer the necessary questions without wasting time in useless questions and start the treatment immediately.
Instruments useful in First Aid Treatment
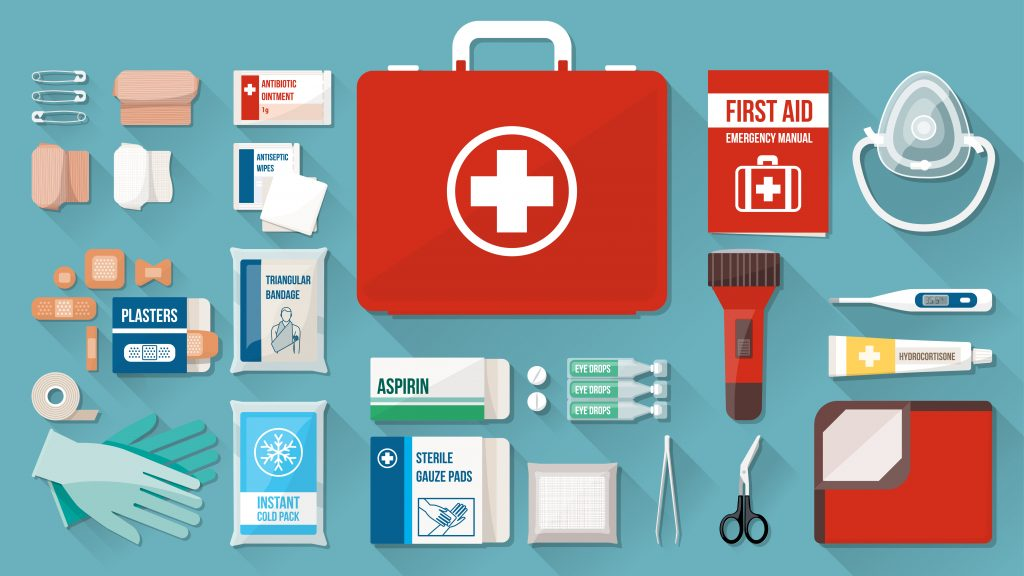
A box of First Aid Treatment equipment should be bought from a chemist shop and kept at a suitable place. It should mainly contain the following items.
- Autoclaved 5 cm. to 10 cm. No bandages and adhesive tape
- R cm. to 10 cm. Bandage of width and adhesive tape
- Johnson’s Adhesive Tapes are now readily available.
- Rs (cotton)
- Scissors, (Safety Pin) Safety Pin etc.
- Clean, ironed pieces of 1 sq.m. which can be used as slings. Can be used for patient transport and support.
- Paper and pen (ball pen etc.) to record patient details
- Tongue depressor (Tongue depressor).
- Airway for movement of air
- Use (splint) board, paper etc. where there is a possibility of fracture
- Thermometer to measure fever
- Tourniquet to stop bleeding (Tourniquet).
- Rubber mackintosh (rubber cloth)
- A lamp or a match
- Eye drop tube
Apart from this, necessary medicines can be kept. Antiseptics Antiseptic and Disinfectant are as follows.
1) Dettol (Dettol):- Mix 2-4 spoons in 1/2 liter of water to clean the wound.
(2) Savlon:- It can also be used in place of Dettol (1 to 1 tsp in about 2 liters of water).
(3) Potassium Permagnet: It can be used as gargle in throat diseases and also in snake bites. Water can also be used to autoclave
(4) Spirit :– Autoclave skin as well as injection bulb.
(5) Boric acid :- It is used in the form of 5% liquid for oral care or to wash the swelling or wound on the skin.
(6) Iodine:- It is advised to use it to autoclave the skin or to heal the wound.
Betadine/Povidone in wound dressing form is suitable for wound healing.
(7) Mercurocom (red medicine) :– Earlier it was used a lot as a wound healing autoclave.
(8) Acriflavin :– Useful as antiseptic for wound healing.
(9) Nitrofurazone :- Useful in wound healing as an antiseptic.
(10) Hydrogen Peroxide :-Used to wash the wound thoroughly. The use of which loosens the crust etc. in the wound. and cleans the wound.
(11) Silver Nitrate :- When a wound does not heal, some layer on the wound gets burned. Applying silver nitrate on top of it loosens and helps heal the wound.
(12) Junction violet :– Useful when there are sores in the mouth or fungus infection on the wound.
(13) Carbolic acid :– Useful for burning wounds caused by dog bites or snake bites. Wound radar is also useful in disinfecting instruments such as scissors or paddles. At present its use is not found in Wound Ray.
Community Emergencies:-
A social emergency is any unexpected event. The life of a person is put in danger due to many reasons like accident, sudden falling of a house, construction or cliff, natural calamities like storm, flood, fire, earthquake, man-made calamities like blows etc.
Calamities:-
Human life is not only plagued by accidents. Natural and man-made calamities also affect it.
(1) Floods
(R) Storm
(3) Earth Quake
(4) Famine
(5) Heat Wave (Lu)
(6) Cold wave
(7) War
(8) Accidents caused by railways, planes, ships
(9) Large fire
(10) Building to sit down (collapse).
(11) Infectious diseases-epidemic, cholera, plague, jaundice, typhoid
(12) Food Poisoning
(13) Toxic effect of alcohol
A large number of people are found in such a situation at one time. There are so many people at one time. It is a difficult task to give first aid to such a large number of wounds at one time. It becomes necessary to set up a First Aid center at the disaster site. There is a need to call for help from elsewhere and set up mobile hospitals. Even here, even though more persons have become victims of calamity, the principles of First Aid remain the same. During this time help can be obtained from the organizations mentioned below.
(1) Government hospitals and dispensaries
(2) District Council
(3) Municipal Corporation
(4) Private clinics and hospitals
(5) Red Cross
(6) Police account
(7) Army
(8) Scout and Guide
(9) Home Guard
(10) Private clubs like Lions Club, Rotary Club
(11) UNICEF, World Health Organization (W.H.O.) W.H.O
(12) 108 Emergency Ambulance Services.
Ambulance Services –
Ambulance service is a public utility service. An ambulance is a matador or a vehicle in which a patient can be comfortably carried. It has doors that open fully at the back, so that the patient can be taken inside on a stretcher. After the stretcher is brought in, there is sufficient space on all sides where the doctor, nurse and stretcher bearers can sit. The stretcher is mainly placed on the right side. Ambulus consists of two parallel iron rods on which the stretcher can be moved in or out very easily. The patient is taken in from the head first in the ambulance so that the doctors, nurses on the right side can give the patient first aid. It is especially important to keep an ample amount of emergency medicine and a first aid kit in the ambulance. A large ambulance is equipped with an operation table to facilitate immediate surgery. This large ambulance is truly a mobile hospital. which serves patients from surrounding areas and urban slums.
Ambulance vehicles are fitted with flashing lights and sirens on the front. The color of the ambulus is white with a plus (+) sign in red on the side and back. So it is quickly recognized. The word ambulus is also written all over. All these things are very necessary so that first priority can be given to other vehicles on the road in urgent circumstances. So that the patient can be delivered to the hospital or nursing home as soon as possible and the life of the patient can be saved, the letters “ambulus” are painted in red on the ambulance. Traffic rules are not applicable especially for ambulances when transporting critical patients to hospital. During the war, ambulances carrying the wounded to the battlefield are not attacked. Ambulance service is available round the clock. Every first aider should have a list of ambulance services. Such listings can be found in local telephone directories.
Bandaging & Splinting:-
The act of covering a wound or an injured part is called bandaging. Its purpose is as follows.
(1) Prevent wound infection
(2) To support and rest the injured part
(3) A cushion of cotton or wool, gauze or a pillow to keep it in place.
(4) Stop Bleeding
(5) To immobilize the fractured bone
(6) To immobilize the injured part to prevent pain.
There are many types of bandages. If work (Roller bandages) Vita Bandage, Triangular Bandage, Many Tail Bandage (for Abdomen), Four Tail Bandage (for Hadapanchi), T Shaped Bandage (Perineum) and Scrotum part.
Bandages are made from ru (cotton), hemp, wool or special fabrics. Like stabilizer bandage, crepe bandage etc.
As mentioned in the table below, the length and width of the bandage should be according to the part of the body to be bandaged.
Part Width (cm) Length (meters)
Head 6-7 4-6
Chest 10-15 6-8
Hands 5-6 3-4
Thighs 8-9 4
Legs 6-8 4
Fingers 2-5 2
Wrist 5 3
Hand Claw 5 3
General Rules For Applying Bandaging
(1) Bandage should be of proper size.
(2) Keep the patient in a comfortable position.
(3) Keep supporting the injured part while tying the bandage
(4) Your face should be facing the patient while tying the bandage. The head bandage is an exception to this
(5) If the bandage is to be tied on the right limb, hold the bandage in the left hand and if the bandage is to be tied on the left limb, hold the bandage in the right hand.
(6) Wrap the part on which the bandage is to be tied first. Hence the bandage will not slip and will not get cut.
(7) Place the end of the bandage on the outer part of the washed area and roll the bandage twice over the wound so that it does not leave the area.
(8) Wrap bandage from bottom to top and inside out.
(9) While tying a bandage, after tying one loop, tie the second loop in such a way that the first loop is covered by R/3. In this way, wrapped bandages can be tied over a much larger part of the body.
(10) Do not tie the bandage too tightly or too loosely.
(11) When the bandage is tied, secure the ends with a safety pin or sticky tape, or bring the ends round to face each other and tie a knot on the other side.
Vita bandages are used as simple twisted, upside down or English gut shaped or spica bandages.
(1) Simple Bandage:- Such a bandage is wrapped on the injured part of the arm or leg.
(2) English (8) Eight-shaped bandage :– This bandage is tied diagonally on the body part. And it looks like an English figure eight when folded upside down. It is used for binding on knee and elbow.
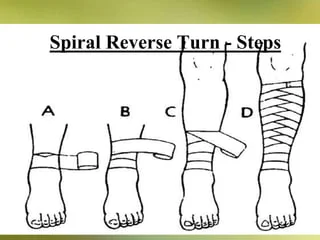
(3) Upside Down Bandage :- In tying this bandage, the bandage is turned downwards at the end of each turn. This bandage is tied on the parts of the limb where the limbs are widening from less to more.
(4) Spica shaped bandage :– This is a variant of figure eight shaped bandage. Which is used for thapa (batkus), shoulder (shoulder), thigh (thai) or thumb.
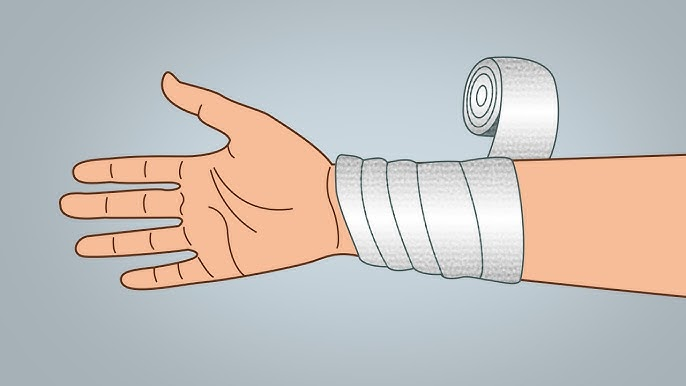
Ways to bandage fingers:-
(1) First turn the bandage on the wrist.
(2) Then wrap the bandage from the back of the hand to the fingertips
(3) Tie the bandage tighter to the tip of the finger, but keep the nail open. Thus, if the bandage becomes tighter and the blood does not flow, it can be seen if the nail turns brown.
(4) Tie the bandage again from the back of the hand to the wrist.
(5) If only the toe is to be bandaged, wrap the bandage straight from the tip of the finger to the tip, from the tip to the back of the finger. Take it back to the root and take it to one side and start from the root of the finger and apply it on the finger.
How to bandage the hand and all four fingers (except thumb):–
(1) Wrap the wrist.
(2) On the back of the hand, take a single wound loop over the tips of the fingers and take the bandage from the back of the palm.
(3) Cover the arm with a bandage.
(4) Complete the bandage on the wrist.
(5) Eight-shaped bandage also works for this.
Ways to bandage the thumb:-
(1) Begin with a wrist twist. Figure 13.5 (on next page)
(2) Bend the back of the hand to reach the thumb and back to the wrist.
(3) Keep rubbing the toe in this manner until the injured part is covered.
(4) Keep rubbing the toe like this until the injured part is covered.
Ways of tying a bandage on the back of the wrist:-
(1) Take two sticks to fix on the wrist.
Take the bandage diagonally across the wrist from the back of the hand to the index finger, across the palm to the base of the fingers, and diagonally back to the wrist. Keep turning like this as needed.
Ways of tying a bandage on the forearm:-
(1) Secure the bandage to the wrist.
(2) Tie a curved bandage, turn it upside down and bend it on the back of the forearm.
Ways of tying a bandage on the elbow:-
(1) Secure the bandage around the elbow.
(2) Tie the bandage in the shape of an English figure of eight (8) The figure of eight bandage should face the front.
- Ways of tying a bandage on the part (Arm) between elbow and shoulder:-
(1) Fix the bandage near the elbow.
(2) Tie a simple twisted bandage.
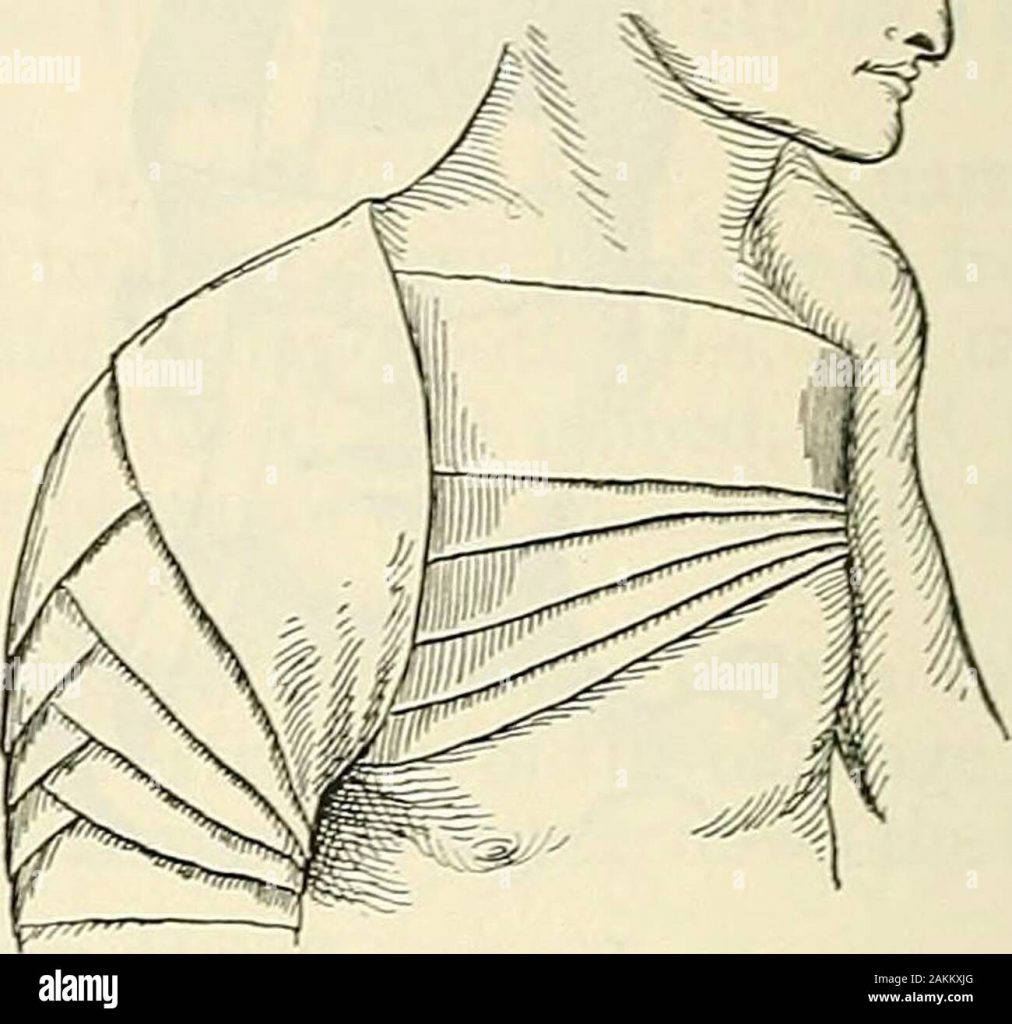
Ways to tie a bandage on the shoulder:-
Continue tying the bandage from the healthy side of the armpit. Roll the shoulders away from the chest.
(1) Turn the bandage from the armpit and take the chest side forward. Again turn it over the shoulder and remove the chest side with a bamboo stick. Again turn it over the shoulder and bring the bamboo loop to the chest side, in this way, make the second loop slightly higher than the first loop.
(R) Tie the bandage until the entire shoulder is covered.
(3) Fix the end of the bandage on the chest.
Ways of tying a bandage on the head:-
70-80 cm. m. Take a long curved bandage and place it on the head so that the two strips hang evenly over the face in front of the ears. Ask the patient assistant to hold the strap firmly.
(1) Take a rolled bandage on the forehead and apply some paste.
(2) Remove this bandage from under one of the two mani strips.
(3) Take the bandage slightly diagonally and take it from the other ear under the bandage and bring it forward near the forehead.
(4) Again in the same way take the bandage from under the first strip and take it more diagonally and turn it up at the back of the head and take it from the other ear under the strip on that side and take the forehead side. Spread the bandage like this until the head is covered.
(5) Finally, tie both ends of the vertical strip with a knot under the grip.
Ways of tying a bandage on the eye:-
Beginning of the bandage for the right eye Tie the bandage from right to left on the forehead.
(1) Take it diagonally at the back of the head from behind the right ear and take it over the right eye.
(2) Tie a twisted bandage on the forehead and eye simultaneously.
(3) On the next page tie the bandage for the left eye in the same way as in the vertical direction.
Chest- Ways of tying a twisted bandage :-
(1) Put the beginning part of the bandage about one meter on the right or left shoulder.
(2) Apply several loops of rolled bandage around the chest from bottom to top.
(3) Take the loose end which is on the chest and tie it to the other end on the bamboo from the shoulder.
Ways of tying a bandage on the breast:-
(1) Tie the bandage diagonally from right to left for the right breast.
(2) The loop around the breast goes to my other shoulder and comes back to the right armpit.
(3) Then wrap around the chest to support the breast and stabilize the bandage.
(4) Take the second brick slightly higher than the first brick while hitting.
(5) Several bricks should be laid in this way and each brick should rise slightly above the previous brick.
Ways of tying bandage on Abdomen and Groin:-
It is convenient to tie a twisted bandage in the upper and middle part of the abdomen. It is not satisfactory for the gum area, as it may cause the bandage to slip. So mix that bandage with spica bandage and bind it to the side, lid and surrounding area. Bricks move forward, backward or side to side.
(1) Secure the bandage to the abdomen with a rolled bandage.
(2) from back to front and from left to right on the gryhya part, on the inner part of the sac, of the sac
Bring the support around the front piece and fasten it back to the home piece.
(3) After making a few strokes in this way, fix it round the waist.
(4) This spica bandage can be tied in both ascending and descending ways. Therefore, as needed, apply it to the side or the house
Ways of tying a bandage on the leg (Lower limb):-
A bandage on the side is wound in the same way as the shoulder or shoulder to elbow. If it is to be tied in the upper part of the leg, get it and tie it with a spica bandage on the thigh.
Below the knee, the leg bandage is curved and inverted up to the knee wound. Bandage the knee joint with a spica bandage. One way is to start from the lid and move the bandage upwards and downwards. This is called Divergent Bandage (Figure-A). In another way, start from the long side of the knee and move closer towards the middle part. Bandages made in this way are called concentric convergent bandages (Figure-B), with the ends at the knee.
Amputation Stump of the amputated limb (arm, leg, finger) is a bandage to be tied on it.
(1) Tie up with a horizontal thuta on the legs or arms.
(2) Take the upper part of the bandage and bring it down to the front of the side and turn it round and take it back.
(3) Take back a horizontal bandage until the horizontal bandage is struck.
(4) In this way rotate vertically and horizontally and cover the tutha completely.
Ways to bandage the heel:-
Convergent or divergent spica bandage to the heel.
(1) Starting from the raised part of the heel.
(2) Take the next turn above and below the previous turn.
(3) Fix this bandage by turning it diagonally from the sole of the foot.
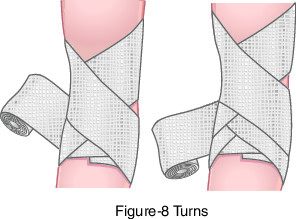
Ways of tying a bandage on the ankle:-
If there is no need to tie a bandage on the heel along with the toe, tie an English ()eight-shaped bandage.
(1) Starting the twist from the top of the ankle.
(2) The circular ends of the bandage are crossed over each other. Wrap the bandage once diagonally across the sole of the foot and again from the top of the ankle to the bottom of the foot.
(3) Turn and take it again in the shape of an English eight.
Ways of tying a bandage on the foot:-
(1) Start with a horizontal bend above the knee.
(2) Take the bandage straight from the back of the heel to the toe and make a few mounds in this way.
(3) Tie the bandage by making a simple bend on the leg starting from the toe.
Ways of tying a triangle bandage on the scalp:-
(1) Place a folded bandage on the forehead near the eyebrows
(2) Take both ends back, bring them right side up over the bandage and turn it around the back of the neck and bring it back to the forehead and tie it.
(3) Bring the open end of the bandage forward and stabilize it as well.
Ways of tying a triangle bandage on the hand:-
Keep the bandage on a flat surface. Keep your hands on it. The fingers should be on the top side of the bandage.
(1) Bend the top so that the fingers are covered.
(2) Fold the other two ends back and knot them over the top. The tumor will be at the level (surface) of the wrist. Apply Ceftipin on the tumor.
Ways of tying a triangle bandage on the chest:-
Place the center of the bandage over the chest and the top over the uninjured shoulder.
(1) Take the other two ends and tie them in such a way that one end is larger than the other end.
(2) Tie the long end to the top of the bandage
(3) If the injury is on a tree, act in reverse.
Arm Sling:–
A triangular bandage is used for this. 90 cm m. The linen is cut diagonally to form a triangle bandage.
(1) Place the top of the triangle bandage under the injured elbow.
(2) Take the upper end behind the neck.
(3) Bring the lower end up and tie it to the neck with the upper end
(4) Secure the bandage of the elbow wound with forward-facing safetypins. This will become a resting place for the elbow.
If the bandage is properly wound, the belt will be in a comfortable position above the waist. The wrist should also not hang down.
Ways of tying a triangle bandage on the elbow:-
(1) Bend the elbows at right angles
(2) Take the top of the bandage over the palm and take the part of the bandage in the middle of the forearm.
(3) Cross the other two ends and tie them above the elbow.
How to tie a triangular bandage on the knee
(1) Bend the knee to a right angle
(2) Place the bandage on the front of the knee with its tip side to side.
(3) Cross the bottom two ends facing each other and bring them up side by side. Lumpy in side.
(4) Lower the top.
Ways of tying a triangular bandage on the foot:-
(1) Place the bandage on the ground
(2) Place the patient’s feet on it, keeping the tip of the toes aside.
(3) Bend the top back and let it come up to the knuckle wound.
(4) Pull the other two ends around the bell and bring forward and tie a knot in front of the bell.
(5) Apply a safety pin with the top facing down
Trefoil Bandage :–
1) This bandage is used when one side of the face or ear or jaw is injured.
(2) Wrap two or three loops of bandage over the head.
(3) Take the bandage diagonally from the back of the head and pass it under the jaw to the other side.
(4) After this roll upwards from the jaw to the head and finally from the back of the head forward to the forehead
(5) After this roll up the head from the jaw and finally bring the bandage to the forehead from the back of the head. Stabilize with ceftipin.
Four foil bandage :-
By tearing a rolled bandage at both ends from a piece of gauze cloth, four bundles of bandage are made. With this bandage, it is easy to keep the dressing fixed on the neck, nose, forehead or the back of the head by making it like a bag.
T-Shape bandage
Such a bandage is made by placing two bandages made of gauze or twisted at right angles to each other. This bandage is used to keep the bandages from the private part in place.
UNIT:- (II)
MINOR INJURIES & AILMENTS
– Wounds:-
When there is a break in the continuity of the skin due to a blow, it is called a wound. There are different types according to the type of injury. which are described below.
(1) Abrasion:-
This injury occurs in the outer parts of the skin. When a hard object hits the skin, the injured part turns red and bleeds from several small wounds. The amount of blood is low. This is a minor injury found in the body.
(R) Laceration:-
The core of a wound caused by a blunt weapon is broken and irregular. Bruises are also visible here and there. The organs at the base of the wound are also cut off. So that the threads of some organs appear to be hanging horizontally in the wound. Substances enter it from outside. Due to the crushing of blood vessels, blood flow is reduced.
(3) Incised wound:-
A cut occurs when the skin is struck by a sharp-edged weapon. The sides of the wound are precisely cut, the blood vessels are also precisely cut and hence blood flows through them in a special proportion. There are no scratches on the sides. And the Wound looks wide.
(4) Punctured Wound:-
When a nail, nail or knife is bent straight. Then this type of perforation occurs. When it penetrates through the integument, it is known as a perforating wound. These lesions are smaller in length and width but more in depth. Even if blood does not come out much, it can damage the organs inside. D. T. A puncture wound to the chest or abdomen is a serious injury caused by a sharp object.
(5) Team (Contusion, Bruises) :-
Such injuries are caused by hard and blunt weapons. Blood vessels under the skin are ruptured. But the upper skin intake remains. Bruising and redness occur immediately after injury. If it occurs in depth, it may take a day or two to appear. Its color will turn brown in a day. In three-four days it turns brownish in color and turns green in five-seven days, yellow in eight-ten days. It gets cured in fifteen days.
Gun shot injury:-
The wound where the bullet hits is small and circular. Sometimes it even goes across. The wound on the other side is relatively large when the bullet passes through. But according to the type of bullet, the internal organs are very damaged. These lesions are also more in depth. Blood flow is more or less. Even if blood does not come out much, it can damage the organs inside.
First Aid Care of Wound (Do First Aid of Wound as below).
(1) Determine the amount of patient bleeding and the amount of shock. And treat this situation.
(2) If the bone is sprained or broken, give first aid.
(3) Wash your hands thoroughly with soap.
(4) Remove foreign matter which can be easily removed from the wound.
(5) Clean the area around the wound with an anti-infective.
(6) Wash the wound with an anti-infective and then apply an anti-infective or antibiotic cream to the wound.
(7) If the lesion is 5 m. m. If it is wider than , bring the two ends of the wound close and paste the sticky strip on it. Be careful that the entire wound should not be covered with it.
(8) Cover the wound with sterile gauze.
(9) Immobilize the gauze bandage with a bandage or adhesive tape.
(10) Apply ointment on both sides of puncture wound and bandage
(11) Wrap the patient in an ironed cloth when there is injury over a wide area from burns etc.
(12) Apply ice on the team within the first 24 hours. So the team stops growing. And smaller. After 24 hours, shake with a bag of hot water so that the dough becomes smaller.
In the following type of wound (wound), doctor’s treatment is necessary.
(1) Deep Wound
(2) Wide, large lesions requiring stitches.
(3) Foreign body
(4) In case of injury to muscle (Tendon) or (blood vessels) Pulse
(5) Hand and foot injury and movement of finger is stopped
(6) If fingers or toes are mutilated
(7) When a large quantity of infectious substance appears to have been ingested
(8) Wound on the chest
(9) Abdominal Wound
First Aid treatment of Wound on Chest
A penetrating wound on the chest is considered a dangerous wound, lungs, heart, main arteries, veins etc. are in the chest. If the Lung is cut, the patient coughs up blood-like foamy sputum. If the air gets squeezed in the pleura, then the Lung gets compressed. If the heart or major blood vessels are injured, the body feels shock. And the patient’s condition worsens. This time management is done as follows.
(1) Lay the patient in half sitting position.
(2) Cover the wound with a strong airtight dressing, placing polythene between the dressings.
(3) Fixing the dressing to the chest with a bandage.
(4) Take the patient to the hospital immediately.
First Aid treatment of Wound on Abdomen
A penetrating wound on the abdomen is serious. Understand that because a part of the intestine in the stomach, Blood Vessels can be cut and as a result of this, serious consequences or even death can occur. If the Wound chance weapon that injures the abdomen is thrust into the abdomen…
(1) Do not try to pull it out.
(2) Place the patient in a comfortable position
(3) Make a ringpad of suitable size cloth around the weapon.
(4) Place the dressing over it, wrap the bandage properly. It is important to realize that the Wound Sharp weapon cannot go too deep and cannot move.
(5) Manage grief.
(6) Send patient to hospital immediately.
If the wound on the stomach is large, the intestine may protrude from it.
(1) Do not try to put the intestines back into the stomach
(2) Cover the exposed intestine with a clean cloth soaked in lukewarm water.
(3) Manage shock.
(4) Take patient to hospital quickly.
Foreign Bodies:-
Open body parts such as ears, nose, throat, horn, stone (especially in children) insects, splashes or penetration or Accidentally glass entering the body or any object that slips etc. is called foreign body.
Foreign Body in Throat:-
When a small boy curiously puts a coin, a piece of paper, etc. in his mouth or a fish hook gets stuck in his throat while eating, the patient complains of a sore throat, pain, etc. If the foreign body is stuck in the respiratory tract, swallowing becomes difficult.
If there is a blockage in the trachea and there is difficulty in breathing, it is necessary to take the patient to the hospital without taking home remedies. If it is confirmed that it is stuck in the oesophagus, reassure the patient as well as the relatives and find out the details and find out the type of foreign body and give appropriate treatment.
If there is a piece of paper, a coin or a grain or a lumpy object, then feed banana or boiled potato, cooked rice or bread soaked in tea / milk so that the foreign body descends from the oesophagus.
If any foreign object like safety pin, nail, fake teeth is stuck in the throat, contact the doctor or hospital immediately. If it takes time to call the doctor or contact the hospital, make a sandwich between two pieces of bread and feed it, so that the sharpness of the sharp object decreases and the severity decreases.
Do not give laxatives even by mistake. On the second and third day, observe the diarrhea closely to see if the foreign body has passed.
Foreign Body in Nose (F.B. in Nose) :-
Usually little boys put things like chickpeas, peas or horns into their noses out of curiosity. Patient is unknown. Bleeding can also happen if something is inserted. Ask the patient to breathe through the mouth so that the foreign body does not enter the respiratory tract.
Patient should try to sneeze by inserting a sneeze sneeze or a cotton swab into the other nostril. Sometimes the foreign body is thrown out with the sneeze. If it doesn’t work, take the patient to the doctor immediately.
Foreign Body in Ear (F.B. in Ear) :-
Just like the nose, boys sometimes put chickpeas etc. in the ears. Sometimes a small insect gets stuck in the ear. Whenever it is known that the insect has gone into the ear, a little heated oil should be poured into the ear, so that the insect stops fluttering and dies and the pain subsides. Try only if the second foreign body comes out easily because the eardrum is very delicate and can cause trouble immediately. Seek the help of a doctor in case of trouble.
Foreign Body in Eye (F.B. in Eye):-
A particle, a small insect, a small iron particle, a sawdust, a hair, anything can get into the eye. It hurts the eyes. Water flows from the eyes. The fruit turns red. And it becomes difficult to open and close the eyes.
To calm the patient, explain not to rub the eye. If the foreign body is loose, it sometimes comes out with tears. So wait for a while, close the eye in a saucer-like vessel filled with water so that F. B. gets out of the water.
However, if it does not come out, open the lower eyelid and take the foreign body in it. If the foreign body is in the upper eyelid. If it feels like this, bring the upper eyelid over the lower eyelid and push very gently so that the F. B. on the upper eyelid sticks to the outer part of the lower eyelid and the problem is removed. If there is F. B. on the cornea, take the patient to the doctor immediately. (If possible, put a drop of Diwal or Paraffin in the eye and close the eye so that the eyelid does not move so that the retina is not damaged)
If a chemical has gone into the stomach, the problem is aggravated. If acid or base element is not known, wash the eyes with water. If it is known in detail, if the amla tattva is gone, make warm water of baking soda and put it in the eyes. (Put one teaspoon of soda in 1/2 liter of water) and if there is salt (Base) element, wash your eyes by putting two teaspoons (vinegar) in 1/2 liter of warm vinegar. Then put Divel or Liquid Paraffin in the eye and close the eye with a cotton pad as mentioned above.
Foreign Body in Skin :-
If a sharp object enters the lower part of the hand or foot (such as a thorn, thorn, nail), if the outer end can be grasped, grasp it and pull it hard. Otherwise, take the patient to the doctor. If there is something bent like heat, take the patient to the doctor without wasting time.
Foreign body in trachea:-
Sometimes as mentioned above, the second F. B. gets stuck in the breathing tube when the patient gets very scared. And the speaking stops. At that time, the person standing next to him should make an immediate diagnosis and take immediate measures. In such cases the following steps are taken.
(1) Back Blows on Bamboo :-
Stand behind the patient and support the patient with one hand above the abdomen. Bend the patient forward so that the head is low. With the other free hand, punch the back between the two bones. By doing this, the foreign body may get stuck due to force.
(2) Heimlich’s manoeuvre.
Stand behind the patient and hold the patient’s waist with one hand and hold the wrist of that hand with the other hand. Press the pressure of the thumb of the first hand four times on the stomach. If the patient is not conscious, sit on the patient’s two legs and press the upper part of the stomach with both hands.
(3) If F. B. is thus stuck in a small boy, turn him upside down and hang him by two legs and punch him in the back so that F. B. comes out.
Once the airway is opened, the patient starts breathing on his own. Allow the patient to have open air. If it is too late, respiration does not continue even after the removal of the foreign body. If it is known, artificial respiration (artificial respiration) has to be given immediately.
Fire & Burns:-
Burns are dangerous injuries. It can cause death. But burn marks like rough skin, white spots or disfigurement are very painful. It is essential that he gets prompt and proper treatment.
Causes Of Burns (causes of burns are as follows).
(1) Dry heat like smoldering from fire
(2) Applying hot metal to the skin
(3) Chemicals like nitric acid, sulfuric acid, ammonia, caustic soda.
(4) Electricity
(5) Radiation
Wet heat also burns.
(1) Boiling water
(2) Steam
(3) Hot oil and asphalt
The effect of burns is the same. When the effect is superficial, the skin itself is damaged. All others are cases of deep organ burns. The first aid provider should focus on the extent of skin burns. How deep the burn has affected the organs is a less serious matter during first aid. How much skin is burned by applying Wallace’s Rule of 9? It is easy to determine.
Wallace’s law of combustion conditions.
(1) Head and Neck – €% =09
(2) One Hand – (9% × 2) = 18
(3) Chest – (9% × 2) = 18
(4) Bamboo (Back) (9 % x2) =18
(5) Each (9 % x 4) =36
(6) House part (Private Part) 1% = 01
100%
Burns burn the body. And severe pain occurs. Feel thirsty. In case of a simple superficial burn, the skin becomes red. In case of deep organ burn the skin becomes red. and appears black. Superficial burns cause blisters.
When the patient has burns in many areas of the skin, he is in shock. It also shows the effects of less oxygen in the breath due to smoke. Carbon monoxide poisoning also occurs.
First Aid on Dazaya (First aid care of Burns) is as follows.
(1) Pour water on the body or wrap the wound in cloth to extinguish the fire. Do not walk or walk around a person who has been burned. Especially should not be allowed in open air.
(2) Immerse the burnt part in cold water. For this, keep the burnt part in cold water for 15-20 minutes in a bucket, kitchen basin or under running water and remove it after the pain subsides. If this is not possible, apply cold water to the burned area and change it frequently. Doing so removes heat from the burnt organs. And further damage is prevented.
(3) If water is not available, cover the burn with an autoclave bandage or cover with a freshly washed clean cloth. Burned part should not be exposed to air. If the big face is burnt, make a band of that shape and tie it with ears instead of mouth and nose.
(4) Some time after the burn, the burnt parts of the body become swollen. So remove the ornaments that are sticking to the finger, shoes, boots or other body.
(5) After removing the small and upper last burnt part from the water, dry it without blotting and cover it with a sterile bandage. If the burn is large, stitch it with a clean cloth.
(6) Arrange for immediate hospital transport.
(7) Take ice in a towel and apply it to the burn while being taken to the hospital.
(8) Do not apply flour, butter or baking soda on the burnt part.
(9) Do not apply any paste, ointment or oil on the burnt part. (10) Do not try to burst the blisters if they arise.
(11) Do not try to pull off the cloth stuck on the burnt part in First Aid itself because it causes a lot of pain. It also tightens the skin. And the removal of the covering over the wound exposes the area to infection with airborne germs (Micro Organisms). Burnt skin or clothing is sterilized by mixing. It is more desirable than an open wound.
(12) Touch the patient as much as is necessary and make him move.
First Aid Management of Case of Chemical Burns
Chemical burns continue the process of burning and damage as long as the chemical remains on the body. Take the following steps in First Aid.
(1) Dispose of chemically soaked clothing precautiously in water. Make sure they don’t touch that chemical.
(2) Immerse the affected part in cold water for 10-15 minutes and wash evenly. If the patient is burnt with acid, then it can be washed with water containing soda bicarb. And if burned with alkali, wash with water after using vinegar.
(3) To perform general treatment on burns.
Index burn-blisters also produce the same effects as burns from any other cause.
(1) Take the patient to the shade.
(2) Keep giving cool drinks little by little to the more burnt patient.
(3) Perform general first aid on burns.
(4) Call a doctor.
A fast Vata wind can also cause skin burns.
(1) Apply wet cream liberally.
(2) Protect the exposed part from the wind.
(3) Perform general first aid on burns.
Stretching of the rope against the body causes blisters. It falls on the hands or feet. Such blisters occur while exercising, climbing or boating. These blisters are just as painful and damaging as sunburn blisters.
1) Keep the blistered part in cold water.
(2) After the pain subsides, remove from the water, dry the affected part and cover with a dry Autoclave bandage.
(3) Wear gloves while working.
Electrical injuries are caused by high tension electrical currents or natural lightning strikes. From where the flow enters the body. and from where exits. Heat is generated at both these places due to electric current. And burn marks are visible. d. C. Catching the flow keeps one clinging to it as long as the flow continues. So the bow is damaged. a. C. A person is thrown in the gust of current. So the damage caused by electric current is less. If the patient falls, he may also get hit. An injury related to Respiration or Cardio Vascular System can be caused due to lightning strike. If that happens, respiration or heart stops. Moist clothes, shoes, or ground make lightning conductors faster, thus causing more damage. Patient goes into shock state.
First Aid Management of Case of Electric Shock
In case of electric shock take the following steps.
(1) Turn off the power switch and remove the plug from the socket.
(2) If the patient is lying in water, keep yourself away from him. Because water is an excellent conductor of electricity. For the same reason, do not hold the patient by the armpit.
(3) If it is not possible to stop the electric current, stand tall on wood or a pile of prints and take a long stick in hand and release the electric wire from the patient. Wear rubber gloves if possible.
(4) Give artificial respiration or perform external cardiac massage if required.
(5) If there is a condition of shock, treat it first.
(6) Treat blisters if present.
(7) Perform general first aid on burns.
(8) Give tea or coffee to the patient when he recovers.
(9) Arrange for immediate hospital transport.
UNIT:- (IV)
LIFE THREATENING CONDITIONS
Haemorrhage (Bleeding) –
Bleeding occurs whenever blood vessels break due to injury or wear and tear. Blood coming out of blood vessels is called bleeding. It has two types.
(1) External Bleeding – Bleeding occurs when the skin breaks due to any reason. This blood comes out through the skin.
(2) Internal Bleeding – Blood leaks inside the body. That which cannot be seen from outside is called Internal Bleeding.
Bleeding occurs from Artery, Vein or Capillaries. Bleeding from an artery causes the bright red color to flow anteriorly due to the beating of the heart. Bleeding from a vein is dark red in color and completely uniform. Bleeding from a small tube is also bright red in color but the amount of blood is very less and flows without symmetrical force.
Types of Bleeding
There are three types according to the time of blood flow.
(1) First Bleeding :- Bleeding that happens whenever an injury occurs.
(2) Reactionary Bleeding :- Which is seen within 36 hours of injury. Mostly happens in 4-6 hours. By coming out of shock or the transfer of blood from the other side, by the activation of collateral circulation or by the slipping of the tumor that has closed the blood vessels.
(3) Secondary (Secondary) Bleeding :– Which usually occurs within 3 to 10 days of the first injury. Mostly the wound is ripe (Abscess).
Some type of Bleeding problem occurs due to some defect in the body.
(1) Haemophilia :– Illness due to deficiency of blood clotting factor in which blood clotting does not take place on time.
(2) Purpura :– Bleeding from small capillaries due to platelet defect in blood which appears deposited as drops under the skin. Due to this, the color of the skin is red or blue.
(3) Jaundice :- When the liver gets worse, Bleeding occurs due to the production of factors that help stop bleeding.
(4) Bleeding due to increase in blood pressure:- Bleeding often occurs in the internal part of the body. In which the patient gets cold. Feeling more thirsty. Difficulty in breathing. Pale in appearance, blood pressure is measured to be low.
Whenever there are signs of internal bleeding (which is not visible to the eye), the patient should be placed in such a way that the head is down and the legs are elevated (5 to 10 inches) (Head Law Position).
First Aid should be given as follows to prevent Bleeding.
(1) First, pressure should be applied with autoclave cloth if possible on the bleeding site. This pressure should be applied for 10 to 15 minutes.
(2) If Bleeding has stopped then Bandage should be done with antiseptic ointment mentioned above.
(3) If it takes time to stop bleeding, that part of the body should be kept above the level of the heart (Elevate The Body Part).
(4) Do not attempt to remove a piece of glass or any such thing in the bleeding area.
Even after trying the above experiments, if the bleeding continues, the pressure point should be compressed as shown in the figure.
The point between the heart and the artery which can be pressed with the bone to close the blood is called the pressure point. If the blood is being drained from the carotid artery that supplies blood to the brain and the upper part of the body, then pressure has to be applied on the transverse process of the sixth cervical vertebra to stop it. Fig.
Subclavian artery has to press on the first rib and clavicle on its inner and middle 1/3 joint (Junction).
The upper part of the Humerus Bone of the upper arm of the Axillary artery has to give pressure to the Head of the Humerus in the armpit.
The brachial artery has to push on the humerus near the inner part of the biceps.
The femoral artery has to be pressed against the horizontal part of the pubic bone.
Hand pressure cannot be given too much time to give pressure. Hence, use a tourniquet to apply pressure.
A tourniquet is a cloth or rubber band stabilizer and also a special rubber tube with a hook at one end and a chain at the other. Which is available in the market as Esmarch’s tourniquet. There are three types of tourniquets. (figure)
(1) As the cloth tourniquet is not stabilizing, it has to be tied and turned up so that the pressure is equal.
(2) Similarly rubber band or strip can also be used as tourniquet as needed.
(3) Ashmark’s tourniquet should be properly tied and its hook inserted into the link of the chain as required and applied pressure.
The tourniquet should be tied as close to the wound as possible. While tying the tourniquet, special care should be taken that it is properly tied or not, so that the bleeding is stopped and the front part appears pale. If the pressure is low, the bleeding from the vein stops but the bleeding from the artery continues. Also, blood from the vein fills the front,
The tourniquet cannot be kept in the arm for more than 45 minutes and in the leg for more than 90 minutes, otherwise the front part of the body will fall wrong without oxygen. If it takes time to take to the hospital, the bandage should be loosened for ten minutes in between and then tied back.
Common home remedies to remember:-
(1) If there is bleeding in the anterior part of the elbow or knee, the elbow or knee should be bent from its joint under pressure.
(2) If the arm is bleeding between the elbow and the shoulder, moving the arm back from the shoulder can put pressure on the subclavian artery.
(3) If there is bleeding from the head, pressure should be applied on the temporal artery in front of the ear and on the occipital artery 4 fingers behind the ear as required.
(4) If there is bleeding from capillaries, ice should be applied, pressure should be continued for some time even after the blood stops completely.
(5) Whenever there are signs of internal bleeding (which is not visible to the eye), the patient should be placed with head down and legs elevated (5 to 10 inches). If the bleeding is going on, the body gets cold, so warm it up. An empty stomach is necessary for the patient to be aware of the vial (Anaesthesia). So that the patient does not vomit when he regains consciousness. Then collect the patient to the hospital as soon as possible.
Epistaxis (Bleeding From Nose):-
Bleeding usually occurs due to the breakage of small blood vessels from the nostrils (by hitting something or biting it with a sharp object) or sometimes due to blood pressure. It is called Epistaxis (snoring). In the first aid of Epistaxis (snoring), do the following measures without panic.
(1) Keep the patient’s head down so that the bleeding does not fall on the clothes and the blood does not go into the throat.
(2) Pressing the nose in such a way that the lower portion of that side of the nose puts pressure on the inner nasal bone,
(3) Ask to take respiration by mouth if necessary.
(4) Applying ice or pouring cold water on the head.
(5) If necessary, soak a small piece of Gauze piece (cloth bandage) in cold water and place it in the nostril of that part.
(6) Even if the bleeding does not stop, contact the doctor immediately.
Haemoptysis:-
Bleeding through cough (Sputum) from the lungs is called hemoptysis.
Hematemesis:-
Bleeding from the stomach due to vomiting is called Hematemesis. The difference between the two will be understood from the following features.
Haematemesis vs Haemoptysis
-Complaint of vomiting -Complaint of cough
-Blood does not have foam -Blood has foam
- Blood is coffee color – Red spot is Blood
- May be part of food – May be part of chest phlegm
- In the answer of the question of stomach – In the answer of the question find the symptoms of diseases of the chest. Get symptoms of diseases.
In hemoptysis, if the patient realizes that the blood is coming from the right side, there is no need to apply excessive heat to the wound. Do not give tea, coffee etc. Collect any blood that has come out if possible, so that the amount of blood is known. Contact a doctor as soon as possible.
Haematemesis is usually caused by peptic ulcer or other stomach illness. In it, the patient should lie on the right or left side. If you have to give orally, do not give anything except ice cubes. Contact a doctor. Sometimes the patient complains of passing blood with urine. Keep the patient calm, drink plenty of fluids. If possible, keep the urine to show to the doctor. Keep in touch with the doctor.
Dental Bleeding
If blood is coming from the tooth, soak it in cold water and press its pumdu (pootu) in place of the tooth. Put another big coin on it and ask the patient to press it with the front teeth. Keep it for fifteen to twenty minutes. .
Blood In Stool
Often the patient has diarrhea with blood. If it is red, it comes from the colon and rectum. Know that. Bleeding from the upper small intestine or stomach sometimes creates an emergency. At that time, the patient should lie quietly with his head down. If necessary, contact a doctor.
Respiratory Obstruction:-
The process of taking air in and out of the body is called respiration. Respiratory System consists of respiratory tract, two lungs, respiratory center in the brain and respiratory muscles.
Respiratory tract consists of nose, throat, larynx, trachea, bronchi and bronchioles. The respiratory tract connects with the alveoli of the lungs. Both lungs are covered with a smooth membrane. Outside it is the thoracic cage and below it is the Diaphragm. The lining of the lung is firmly attached to it.
Respiration continues under the control of the Respiratory Center in the brain. It is affected by impulses of brine and chemical changes of blood and the amount of carbon dioxide in blood.
Diaphragm goes down during respiration. Contraction of the muscles between the ribs moves the ribs upwards and outwards. So the chest swells. This also results in swelling of the lungs. and air is drawn in. Oxygen (Oxygen) and carbon dioxide which are in the air that has gone into the lungs and in the cache vessels of the lungs. After that exchange, the diaphragm relaxes and rises. The muscles between the ribs relax and the ribs come down and inwards. And gets fixed in its original place. This causes the chest to contract and the air in the lungs to escape. In this way, respiration takes place 16 to 20 times in 1 minute.
Breathing Obstruction (Asphyxia) is a condition in which the lungs do not get enough air or oxygen to clean the deoxygenated blood in it. Its reasons are as follows.
(1) Oxygen in air is low e.g. On mountain tops, drains and coal mines
(2) When exposed to poisonous gases
(3) Oxygen consumed by fire in a burning building.
(4) Obstruction in the airway- eg. T. Due to foreign matter or food (food) getting stuck in the way of respiration or due to pressure from outside.
(5) Swelling (oedema) in respiratory tract -eg. Sore throat, lump in throat, swelling of larynx, swelling or blisters caused by drinking acid or alkali.
(6) Drowning – By submerging in water, the water enters the Respiration tract. So the respiration tubes are constricted and – hence no air is available.
(7) Slowing down of respiratory center. E.g. Morphine, a barbiturate class drug,
(8) Electrical shock – the effect caused by this.
(9) Pressure on the chest:- Land falling on the chest, due to falling sand, falling down in a mine.
(10) Diseases of Respiratory System like Asthma, Lung TB. etc.
Respiration Obstruction makes a person weak. Dizziness and can not take Respiration. Evi complains. Motu, lips, nails, tip of nose, finger tips turn brown (bluish). The veins on the neck become swollen. When the amount of oxygen in the air is low or there is obstruction in the respiratory tract, the patient’s respiration becomes irregular and the patient becomes unconscious. When Respiration Obstruction is powerful and acute in effect. Then the thick urine comes out.
The first step in the treatment of airway obstruction is to remove the obstruction.
- First Aid Treatment for Drowning
(1) Lay the patient upright, head to one side, arms raised.
(2) Small children can be kept upside down by holding their feet for some time.
(3) Lift the adult by the waist, let the head and legs hang down. This is a way to remove water from the lungs.
(4) Remove the patient’s wet clothes.
(5) Keep the patient warm.
(6) Do not allow the patient to sit.
Hanging (trap or neck tape) its first aid treatment
(1) Cut the gauze around the neck.
(2) Make the patient sit or lie comfortably.
(3) Reporting to the police.
(4) To give first aid treatment as per the need of the patient.
Obstruction caused by a foreign body in the respiratory tract:- The following different methods are adopted to remove the foreign body.
1) Back Blow:-
Stand to one side behind the patient, place the left hand on the chest. The head should be below the chest. Make 4 points above the middle of the shoulder bone (Scapula) on the back. Fig.
(R) Heimlich’s Manoeuver or manual abdominal compression
Keep the hands around the patient’s waist while standing. Then take the belly with both hands. Hold the wrist of the fisted hand with the other hand so that the palm is on the side of the patient’s abdomen and the claw of the hand is between the navel and the ribs, then press the fist firmly on the abdomen four times.
If the patient is unconscious after being hit with bamboo or he becomes unconscious despite using the Heimlich method, then it becomes necessary to use an alternative method (another method) which is as follows.
In this way, make the patient lie down. Keep your feet on both sides of it and fall down. Place the back of the fist on the abdomen between the navel and the ribs, and with the other fist press firmly four times upwards and inwards.
(3) Abdominal thrusts should not be applied to dislodge foreign matter from the throat of small children as doing so may damage the intestines. Place the baby on the left side. His belly should be next to your hand. Support the head with hands and turn the baby upside down. Keep your hands on your knees. And with the right hand, strike the upper dot on the stick 4 times.
4) Chest compression
If the patient is very fat or a pregnant woman, stand behind this method and bring both hands forward from her armpits and apply upward pressure four times on the chest with the right fist. If possible, lean forward on the patient to bring the head lower than the chest.
(5) Find with Fingers
If the patient is unconscious and chest pressure is not successful, open the patient’s mouth and lift the tongue and lower jaw with fingers and thumb. Thus the tongue will come forward and away from foreign objects. Also will be removed from the back part of the respiratory trek. Move the index finger of the other hand from the inside of the cheek to the neck. If foreign object is touched, remove it. Once the airway is opened, the patient will start breathing. Make sure he gets fresh air at that time. If unable to breathe, give artificial respiration.
Mouth to mouth respiration.
Lay the patient flat. Loosen the clothes on his neck, chest or waist. If wearing a dental brace, remove it. If there are false teeth that can come out, remove them. Place a handkerchief ring on your fingers in the patient’s mouth and remove phlegm or other objects from the mouth and throat. Put one hand behind the neck and put the other hand on the forehead and tilt the head back. Raise the grip with the back hand. If the patient starts breathing on his own after doing this, hold the chin in this position.
If respiration does not start, close both nostrils. You take deep respiration. Look at the patient diagonally with your eye to see if his chest is collapsing or not. Now move your mouth away from the patient’s mouth. Tilt your head. So that the respiration coming out of the patient’s mouth does not come into your mouth. In this way fill above 3 Respiration so that Oxygen reaches the patient’s lungs in sufficient quantity.
Then take 12 times respiration every minute in this way. Artificial respiration should be continued until the patient begins to take deep breaths. The same is true for children. The only difference is that the force of blowing and covering both the baby’s nose and mouth with your mouth is relatively low.
In some cases it is not possible to give mouth to mouth respiration. D. T. Hit on the face. Jaw may be broken, lip and mouth may be burnt due to acid intake. In such cases manual breathing method should be used.
– Bawda Lift / Bamboo Press Method (Holger Nelsen) Holger Nelson Method:-
Lay the patient upright. Place both hands under the forehead. Keep the head straight so that the airway is open. Sit with the patient at the head so that one knee comes to one side of the head and the other leg is placed at the elbow of the other side. Alternate legs and knees little by little. Keep both hands near the lower part of the bone (Scapula) on the back of the shoulder. Keep fingers wide open. The toes should be on the side of the spine. Keeping your elbows and forearms straight, bend forward and press with both hands. Count one…two…and stop pushing.
You stand up straight and raise your arms close to the elbows. By then raise the elbows three times now. Keep your arms straight. Four-five times. Lower the elbows to the starting position for a count of 6, then repeat.
This method is not considered suitable if the patient has been hit on the chest or jaw.
– Raise the waist Hip lift /chest pressure methods:-
Lay the patient upright. Lay the patient upright with his forehead resting on his uninjured hand. Rest his forehead on his unwashed hand. Sit on the leg on one side of the patient’s waist and knee on the other side. Leaning forward, touch the patient near the hip bone and lean back a little. Hence the patient’s waist is 10-15 cm. m. You will raise 1…2 ……3 ……. Keep the patient in the raised position until the fold. Then place the patient down and place both your hands on the bamboo till below the shoulder bone (Scapula) and keep the fingers wide and the thumbs close to the spine and count 4 times. and lean forward and apply pressure with the straight arm as far as it can be pressed without obstruction. Here fold 5, 6 and 7. Do the whole action slowly ten times every minute.
Raise the shovel Chest compression method (Silvester) Silvester method:-
Lay the patient flat. Keep the wound under the shoulder. So that the head turns back. Kneel near the patient’s head. Hold both hands by the wrist. Place them opposite each other near the lower chest and press on them for two seconds. Then widen them and bring them quickly to your knees. Let them stay down there for 3 seconds. In this way do this action 12 times in a minute. Use this method when the patient cannot be made to lie down. This method is more effective than the pressure method.
– Prone pressure method (Schaeffer) :-
Lay the patient upside down, keep the big one on one side, keep both hands on top of each other, lay down on it. Kneel near the patient’s waist. Place both hands on the lower part of the bamboo in such a way that the wrists almost touch each other, thumbs forward and fingers together. Apply pressure with your body weight by keeping your arms straight from the elbows and leaning forward. Then bend back to release the pressure. Take Respiration in this rhythm twelve times every minute.
Eve Method Eve Method:-
Lay the patient on a board or stretcher and tie him up in a 45 degree head down and feet down position at the same time. It is necessary to do this 12 times every minute. Vandi, benches or heaps of bricks or stones can be made to take the swing. This method is especially useful for small children
The patient can be given artificial respiration with face mask and ambu bag. After cleaning the patient’s airway, hold the mouthpiece of this tool firmly over the patient’s nose and mouth with the left hand. Holding the lower jaw with a finger near the grabber. So that the tongue does not fall upside down. Press the bag (sack) with the right hand and release. By pressing, the air goes out and by releasing the pressure, it goes into the patient’s lungs and by releasing the pressure, the air goes out from the patient’s lungs. Since there is a valve in between, the air does not go back into the bag.
Johnson and Johnson’s (resustitube) device can also be used instead of the bag and lid mentioned above. This tool is 10.5 cm. m. Long and 18 cm. is a pipe of diameter m. 8.75 cm above it. m. It has a diameter lid that fits snugly over the mouth. And prevents air flow during respiration. This tube is placed in the mouth. Respiration is done by providing mouth to tube air exchange.
Heart stops due to heart disease or respiratory failure. If the heart cannot be made to work immediately, the oxygen-rich blood does not reach anywhere in the body and the organs are permanently damaged. So death happens. In such a situation 20-25 cm. m. A thrust is applied to the sternum from above. External cardiac massage becomes necessary if the heart does not start working with this stake. The heart has stopped working. Its features are as follows. Impurity, brownishness and absence of pulse by placing the hand on the wrist or neck, are. Even if we try to listen by placing the ear on the patient’s chest, the heartbeat is not heard.
By doing external cardiac massage, the heart comes under pressure between the sternum and the spine. So Blood is thrown in the lungs and in the wounded parts of the body. In this way (Mechanical) the heart is induced to contract according to its own law. And the heart continues even after the external massage is stopped.
Method:-
(1) Lay the patient flat on the floor or hard surface.
(2) Lie flat on one side of the patient’s chest.
(3) Place the right wrist on the lower part of the sternum.
(4) Place the left hand on the right hand.
(5) Keep elbows straight.
(6) Vertical pressure in an adult person is 4 cm. m. give as much
(7) Remove the pressure.
(8) Perform this action 60-70 times per minute on an adult person.
(9) The chest of a child under 12 months is 1.5 cm. m. Press and repeat 90 to 100 times every minute. Press the newborn’s chest with the thumb, not the palm.
(10) Check the pulse of the carotid (Carotid) arteries in the neck and at the root of the femoral (Femoral) joint. If your method is correct then you will get a beat in this Pulse every time there is pressure on the heart.
(11) If the patient needs both external compression and artificial respiration and you have an assistant present, you should perform external massage and assign the artificial respiration to the assistant. For this, it is necessary to have 5 chest pressures and 1 chest inflation. If you are alone, after 15 cardiac compressions, quickly inflate the chest twice.
(12) Call an ambulance and send the patient to the hospital when CPR starts.
(13) Until the patient is handed over to the ambulance man or the doctor, you stay with him.
If the heart cannot be restarted within 5 minutes of stopping, the patient is unlikely to recover.
Unconsciousness:-
The state in which a person cannot respond to external stimulation is called unconsciousness. Its common reasons are as follows.
(1) Simple unconsciousness
(2) Head Injury, Bleeding in the brain, stress condition inside the skull, injury to the cerebrum.
(3) Wi
(4) Effects of poisons, such as hypnotics, alcohol, tranquilizers.
(5) Respiration – choking, drowning, effect of poisonous gases in respiration. –
(6) Shock
(7) Apply heat stoke
(8) Various Diseases – Diabetes, High Blood Pressure, Jaundice, Heart Attack, Meningitis etc.
(9) Electric shock
Patient seems to be in deep sleep. And he cannot be awakened. It is not affected by any stimulant including painful pressure (Stimuli). Respiration is slow. The eyeballs are small or dilated depending on the cause of the fainting. E.g.- In case of fainting due to opium, kiki appears narrow and in case of Dhatura poisoning, it appears wide.
First Aid for Unconsciousness is as follows :–
As shown in the figure, lay the patient in a position where the patient is on his left side, his left hand and foot are taken behind him, right hand and foot are slightly folded and hair is raised behind the head so that breathing continues easily.
If it is not possible to keep it in this position, then the patient should lie on his back with his head on one side and his hands behind his jaw on both sides to prevent the tongue from falling back in the throat. If this is not possible, open the mouth, clean the area up to the throat, pull out the tongue with a handkerchief and hold it. Curry
(1) Remove dentures or false teeth
(2) Cut the cloth around the neck, chest or waist.
(3) Remove enclosed standing people and let in open air.
(4) Keep the patient warm (especially in winter).
(5) Watch for vomiting or not.
(6) Try on Pulse and Respiration.
(7) Try for medical treatment
(8) Do not give anything by mouth because it can go into the respiratory tract and aspire the patient.
(9) Do not shake.
(10) Patient should not be left alone (helpless).
In simple fainting, the brain receives less blood for a short period of time. Pulse rate and Respiration are high. Patient appears faint. Inhale the patient with earling salt (analgesic medicine) or chopped onion along with the steps mentioned above. Patient recovers in 5 to 10 minutes. When the patient is completely cleansed, tea or coffee can be given to him.
Prolonged sun exposure can lead to heat stoke. Initially, one may experience headache, dizziness, muscle spasms and sore throat. If there is a fever, Pulse feels fast and weak, Respiration becomes shallow and irregular. Treatment should be done as follows :-
(1) Move the patient to shade or cool place
(2) Taking steps to reduce fever like running a fan, applying ice, applying cold water (sponge).
(3) To do other measures taken in the treatment of unconscious patient.
Hysteria:-
Hysteria is a mental illness. Distress manifests itself in many ways. Fainting is a form of disease expression. Patient is not really unconscious but pretends to be unconscious, he is never hurt by fall because he falls carefully. The arms and legs are stiff, the eyes are tightly closed or wide open, and no one is foaming at the mouth. Splashing cold water on the mouth or smelling sizzling salt and relaxing it can soothe it. Send the patient to the doctor for complete treatment of this disease.
Convulsion:-
Young children (below 3 years) are prone to convulsions due to high fever. Other reasons are decrease in sugar in blood, decrease or increase in sodium in blood, decrease in magnesium, meningitis brain paralysis (paralysis) etc. The child’s body becomes rigid, the eyes are raised. Many times there are shocks. The body becomes dark. Sometimes foaming at the mouth and he becomes unconscious. Then take the following steps.
(1) Lay the child flat on the bed and turn the head to one side
(2) Keep a folded handkerchief in the mouth if possible to prevent the tongue from being crushed
(3) Be careful that the child’s head or limbs do not hit or that the child does not fall from the cot.
(4) Holding the extremity does not stop the convulsions but increases the reversal.
(5) Place the child in the prone position after the convulsions have subsided.
(6) To loosen the clothes on the neck, chest and waist
(7) Do not give anything by mouth
(8) If convulsions are due to fever, apply ice pack or cold water or cold water. Airing with a fan.
(9) To call a doctor
Aura for Adults :-
Epilepsy is preceded by seizures. Some see dimly, some see flashes in front of the eyes, sound in the ears, etc., in the second stage, the patient cries. Then the body becomes stiff and straight like wood. And Respiration stops for half to a minute.
(1) The tonic phase is followed by a convulsion lasting half to a minute.
(2) Convulsive Phase (Clonic Phase) The tongue may be crushed and the tongue and lips may turn black.
Urine is passed due to lack of control over urinary excretion. Normally the patient faints after a seizure and it is uncertain how often he will remain unconscious.
First treatment:-
(1) Move the patient to a safe place as soon as the pre-diabetes signs are understood
(2) Keep patient in open space
(3) Removal of false teeth, pins from the head.
(4) Keeping a spoon or non-occluding device in the mouth so as not to rub the tongue
(5) Administering medical treatment as a future precaution.
(6) Lay the patient on one side (in recovery position).
Give instructions to the patient as follows:-
(1) Card with patient full name, address, disease diagnosis written, always keep in pocket. So that if there is a fit on the way, it will be easy to give the news to the people of the therapy and Dhar.
(2) Patient should not drive any vehicle, not swim.
(3) Stay away from fire, electricity and working machines.
Fainting:-
When for some reason there is a decrease in the blood reaching the brain and thus in the oxygen, the patient becomes unconscious for some time, it is called fainting. If the patient is standing while coming, he gets hit. As soon as someone by the side catches him and stops him from falling, blood starts reaching the brain and the patient becomes clean. In the treatment of this person, make the person lie on a bed and keep the head down, keep the body clothes loose, make sure to get plenty of fresh air. If the patient feels better, give water, tea, coffee.
Stroke (Effects of heat and cold):-
Some people are more susceptible to the side effects of rising temperatures. This effect is more pronounced in military personnel and athletes who train hard in extreme heat of the sun, as well as in humid weather. Young children as well as elderly people are more affected as their immunity decreases. Similarly, people with diabetes, heart disease, insufficient nutrition and people with addictions like alcohol or tobacco are more affected by the side effects of heat and cold.
People who work in the heat of the sun or in factories where there is confined and hot air sweat more due to the heat of the atmosphere. If electrolytes and salts are reduced in addition to water, then the patient complains of headache, dizziness, nausea and vomiting and sometimes stomach cramps. On examination, the patient is pale, drenched in sweat, weak pulse and also has difficulty in breathing. . Body temperature is equal or slightly higher. Giving First Aid as follows.
(1) Keep the patient in a cool, ventilated area.
(2) Loosening of clothes and lying on back.
(3) 250 m every half hour. Lee. Give as much sweetened water or fruit juice as possible.
(4) Treat signs of addiction immediately.
Patients who sweat more, their body water and salt elements are also reduced. Many people drink only water (without adding salt elements), then they get heat cramps in the legs and other muscles. It stays for a while. It gets reduced in some time. So treat them as follows.
(1) Give alkaline water as we give alkaline water to young children (when they have diarrhoea).
(2) A little more salt can be given in cooking too.
(3) If the above treatment does not make a difference, consult a doctor.
Similarly, exposure to extreme cold (such as at the North or South Pole) can lead to stiffness. Frost Bite is especially affected on hands, feet, nose, ears and beard. Due to severe cold, the affected limbs are found to be swollen like Rs. Due to severe cold, the affected parts become white like cotton. It also goes wrong. So treat them as follows.
(1) Remove wet or tight clothing.
(2) Keep the patient in a closed room without heat.
(3) Cover the patient with a dry blanket and let him get warm slowly. Also give warm liquids to drink.
(4) Wear warm gloves until the affected hand turns pink and the affected hand regains consciousness.
(5) Do not allow the patient to smoke because the nicotine from smoking causes vasoconstriction. So the loss can increase.
(6) Prepare for medical treatment as soon as possible.
Poisoning:-
A substance which harms life or causes death if taken in certain quantity is called poison. Poison is also given to cause the death of another person if it is taken accidentally. Toxins can enter the body in the following ways.
(1) By oral route: antiseptics, alcohol, drugs, adulterated or stale food, acid or alkali.
(2) By respiratory route – carbon monoxide, carbon dioxide from marsh gas or gases used in medicine
(3) Ejection Ejections used for sleep or relaxation
(4) Bites and stings- snake or scorpion bite and dog or any other wild animal.
(5) Insecticides for skin
Precautions to avoid poisonous events
(1) Keep medicines out of the reach of children
(2) Medicines should not be stored for a long time.
(3) Do not take medicine in dark, always read label before taking medicine.
(4) Noxious liquids shall never be filled in syrup or other beverage containers.
(5) Do not keep detergents, acids or other substances within easy reach of children.
(6) Do not take medicine without doctor’s advice.
(7) Do not burn coal with closed doors, as it gives off carbon monoxide gas.
(8) Use combustible gas with care.
(9) Stay away from unvaccinated dogs.
(10) Stay away from snakes, scorpions and wild animals.
First aid Measures for Poisonous Event (In case of poisoning, take the steps mentioned below).
(1) If the patient is conscious, which toxic substance, how much and how long ago was taken. Know that
(2) If an empty bottle, paper on the bottle, label or pill is found near the patient, keep it for examination.
(3) If the patient vomits, keep the vomit for medical examination.
(4) If the patient is conscious and cooperative, induce vomiting
Induce vomiting in one of the following ways :-
(a) By inserting the finger in the throat and turning the finger in the back.
(b) Syrup of Ipecac 15 ml. Water heavily from the top of the pot and do it again after half an hour if needed.
(5) If patient is unconscious or known to have taken strong acid or alkali, give patient milk or egg white albumin after vomiting. Tea coffee is also provided;
(6) Take the patient suffocated by poisonous gas out of the room, remove the people standing around him and loosen the clothes on his waist, chest or neck. If necessary, give artificial respiration.
(7) Take him to the doctor as soon as possible.
(8) Thoroughly clean the part of the patient that has come into contact with the poisoned substance with cold water. Also remove the clothes on which the toxic substance is applied. Be careful not to touch the substance. Give the patient plenty of water. Pay attention to whether it fits or convulses.
(9) Universal Antidote A useful remedy for all poisons (all common and all preventive) made by mixing equal parts of burnt toast, milk of magnesia and strong tea. Give it.
(10) If alkali has been drunk, give dilute anacid. If you have taken acid fast, give weak alkali and if you have taken iodine, give starch.
(11) Reporting to the police.
Eating infected and rotten material causes food poisoning. It has a virus. Poisoning takes place within a few hours after consuming contaminated food. Stomach cramps, diarrhea like vomiting water with Blood also sometimes occurs and diarrhea occurs after fever. More than one person becomes a victim of such poisoning.
In the case of strong acid or alkali
Skin of mouth, throat, esophagus and stomach gets burnt by acid or alkali. There is severe inflammation in the throat and stomach. There is also difficulty in respiration.
As First Aid:-
(1) Sit or lie down as the patient feels comfortable
(2) Do not induce vomiting.
(3) Get acidified with chalk, calcium hydroxide, milk of magnesia, baking powder (sodium bicarbonate) in water.
(4) Give things like lemon juice, vinegar, buttermilk if you drink alkali.
(5) Take olive oil, ghee, egg white and milk orally. Apply oil or glycerin on the burnt part of the mouth.
Alcoholic patient If there is an onset of alcohol intoxication, the mother smells of alcohol, with moderate intoxication, the patient becomes delirious. His control over his body and mind is reduced. So that he makes fudge and eats lathdia. Moderate faintness, muscle relaxation and dilated pupils appear. If too much alcohol has been consumed, the patient falls into a deep coma. Respiration is irregular, the gills are distended. Also there is a possibility of head injury.
(1) Make the patient sit or lie comfortably, inform the police.
(2) Do not induce vomiting. If the patient vomits, save the vomitus for medical examination.
Bites & Stings:-
Always treat bites and stings seriously as they can be fatal.
1.Snake bite:-
Normally, a snake does not bite a human unless it is attacked or frightened. Not all snakes are poisonous. Even venomous snakes do not contain venom in every bite. Because when a snake bites in self-defense. Then it cannot be poisoned. It is important to identify snakes. Because if the snake is not poisonous then the injection of Anti Venom is not necessary to remove its poison. If it is a poisonous snake, its species should be identified. So that special vaccine can be given. If the species of snake is not known, take an injection assuming that every bite is from a poisonous snake. Venomous and non-venomous snakes are identified as follows.
Following are the special characteristics of venomous snakes commonly found in India.
(1) Cobra-black snake (Cobra):- 1.5 to 2 meters long, black in color, head and body of same width, fangs on the neck and glasses like marks on it.
(2) King Cobra-Rajnag (King Cobra):- 2.5 to 4 meters long, color yellow, greenish brown or black with white or yellow horizontal stripes on the body or on the fangs and without the mark of spectacles. The scales on the tail are continuous at the proximal end and split at the long end.
(3) Common Crate (Manyar, Chitti-kodia):- 1 to 1.25 m long, shiny black color, 1-2 white arches on back at a short distance from head, yellowish dusty belly, large scales on head and tail Upper scales undivided, not divided as in cobra.
(4) Commongreen Pit Viper (Bamboo snake) or green pheasant:– 1 foot to 1 meter long, bright green color, flat and broad body, triangular head, pit between eye and nose. Yellowish wash line on sides, tail long and scales divided
(5) Russell’s viper-stone pictures:– 1.5 m long gray or yellow velvety color, back with three necklaces of black diamond-shaped dots and divided scales, flat triangular head with English V mark on it, belly white and broadly scaly.
(6) Saw Scaled Viper-Kus:- 50 to 75 cm. m. Long gray or gray with gray, sometimes greenish. Head triangle, white arrow mark on it, wavy lines on both sides and diamond-like shape on upper part of two such lines, head scales small, head scales divided, belly scales broad and tail scales undivided.
If a snake is seen after a snake bite, the patient says that he was bitten by a snake. Normally he is very scared. Where there is a bite, there are two teeth marks at the end of one finger and the wound has severe pain, swelling occurs in the part, it becomes black and blood from other parts of the body also heals, then vomiting, collapse and fainting occur.
After the bite of a cobra or similar snake, the effects of the poison spread to the pulse in 15 minutes to 2 hours. T. Dizziness, lethargy, muscle weakness and paralysis-like symptoms appear throughout the body. Respiration is slow and labored. A patient may have convulsions and the heart stops. A water snake bite initially causes a sharp, stabbing pain, but later becomes painless. Stiffness occurs after 1-2 hours. Stiffness starts from the neck, then the shoulders and then the waist. Urine is brown in color. Difficulty in breathing increases and finally the respiratory system stops.
First Aid in Snake bite is as follows:
(1) Lay the patient down and reassure him. Normally he is very scared. But his life is not in danger.
(2) Tie a wide, cap bandage over the bite, as tight as a finger can go under it. Do not tie it like a tourniquet.
(3) Immobilize the leg or arm with a bandage to prevent the spread of the poison. (The bite is usually on the leg.)
(4) Keep bandages and bandages until medical treatment arrives.
(5) Wash the wound area with water or soapy water.
(6) Immediately take to the hospital (take the dead snake with you if possible).
(7) If the patient faints or stops breathing or stops the heart, then do proper emergency first aid.
If it is not possible to tie a cap bandage over the wound, take the following steps.
(1) Wash the wound area and 3 mm in each tooth mark. m. Make a deep incision. This incision should be done with Autoclave blade. It causes blood to flow and toxins are also flushed out.
(2) With the help of a pump or suck blood by mouth. Place a polythene screen while sucking to prevent toxic blood from entering your body through gum or mouth sores.
(3) Apply ice to the wound
(4) Keep the patient in a stable position
(5) Arrange for immediate transfer of patient to hospital.
(6) Dressing the wound or dressing it with potassium permanganate is not at all common.
Scorpion bite:-
The venom of a scorpion’s bite is even more dangerous than that of a snake. But its quantity is small. Even if the patient has not seen a scorpion after a scorpion bite, he says that he was bitten by a scorpion. Because his pain is perceived from above, normally he is very disturbed by pain. There is extreme pain and burning all over the place of the bite. In the wound, the painful part becomes swollen and turns black. Sometimes headache occurs. In some cases the patient becomes unconscious. Children die of pulmonary edema.
Scorpion Bite First Aid for Scorpion Bite:-
(1) Tie a bandage above the bite site.
(2) Make an incision at the bite site if necessary
(3) Wash the bite site with plain water, a solution of potassium permanganate, or ammonia or tin.
(4) Apply ice to the bite site to absorb the venom
(5) Lay the patient down and give him respiration.
(6) Arrange for medical treatment.
(7) It is not at all common to put a bandage on a wound or to draw venom from a scorpion.
– Honey Bee Bite:-
When a bee stings, it leaves the stinger and the venom sac in the patient’s body. At the site of the bite there is severe pain, swelling, reddening of the skin and pain to the touch.
First Aid treatment in Honey Bee Bite.
(1) Remove the stinger with an autoclaved needle or tweezers.
(2) Do not attempt to remove the thorn by hand as this may press the venom sac and allow more venom to enter the body.
(3) Wash the wound with soap and water.
(4) Apply tincture iodine, washing soda or ammonia.
(5) If a bee or beetle bites the tongue, the respiratory tract gets blocked and obstruction occurs in the respiratory function.
(6) Have the patient suck ice.
(7) If the tongue becomes swollen and there is difficulty in respiration, hold it with a handkerchief and call the doctor immediately.
(8) If the patient becomes unconscious, take steps to keep the airway open in recovery position.
Ten of Leeches:-
Leeches suck Blood. Pulling it does not release.
(1) Light a lit cigarette or candle to the leech.
(2) Clean the bite site with soap and water.
(3) Apply washing soda or ammonia to the bite site.
Dog bite:-
A rabid dog can spread the disease a week before infectious symptoms appear. In Munga rabies, the dog walks on its stomach as all four legs are paralyzed. A dog’s nose is warm at the onset of “sanguine” rabies. And he gives up eating. (Gives up food.) Then he gets organized and walks around as if he is free from anxiety. His brows look drawn. And a look of panic on his face. The hind legs are paralyzed first and therefore appear to be limping. Tightening the throat muscles makes a difference in the barking sound.
First Aid in case of Dog Bite :-
(1) Wash the wound with soap in running water.
(2) Apply 100% carbolic acid or potassium permanganate (KMnO4) (concentrated) solution on the edge of the wound.
(3) Place a dry Autoclave dressing on the affected area.
(4) Stop if the blood flows profusely.
(5) Take the patient to the hospital
(6) Find out whether the dog has been vaccinated against rabies or not.
(7) If there is a stray dog in the street, catch it and observe whether it shows signs of rabies or not.
Other Animal Bites (Treat the bites of other wild animals in the same way).
Jellyfish Bite.
It also causes a little local swelling and a big sore. It causes severe pain and in some cases death.
First Aid Treatment as follows :-
(1) Apply calamine lotion or cream on the washed part.
(2) Or apply baking soda soaked in water.
(3) If the problem is more, take medical treatment immediately.
Portuguese Manwar Sting.
The patient has symptoms ranging from slight pain at the wound site to local swelling, nausea, difficulty in respiration, etc.
First Aid is done as follows.
(1) Obtain vinegar in methylated-spirit and apply it to the affected part
(2) Do not flush with fresh water or sand.
(3) After the signs of the bite subside, pull out the strings like gelatin stuck on the muscles.
(4) If there is more problem, take medical treatment.
Sea Urchin Bite
If the thorn of a biting animal breaks off and remains in the skin, the part becomes inflamed and painless. The wound heals slowly. And they are more likely to get infected.
(1) Wear gloves before touching forks.
(2) Remove the fork
(3) Suku dressing on the wound
(4) Get medical treatment
Conical Mussels :–
Each shell contains an insect of the snail class. Its venom enters the patient’s body with barbed fine hollow heartun-like spears which can be fatal. There is no special medicine for it. If someone is bitten, the first aid treatment is as follows.
(1) Check the patient’s pulse, pay attention to respiration,
(2) Give Artificial Respiration or External Cardiac Massage if needed.
(3) Seek immediate medical attention.
Coral Cut:-
The pebbles are sharp. The resulting incisions are deep, wide and large. It can get infected immediately. The lesions gradually heal and become old ulcers. For such a patient..
(1) Clean the wound with methylated spirit
(2) Remove all debris from the wound
(3) Put autoclave dressing on it
(4) Get medical treatment.
Cardio-Respiratory Arrest
When a person falls into a critical condition due to a serious illness or any other reason, it is called cardiopulmonary arrest. In such a person, the heart and its lungs stop working. Cardiopulmonary resuscitation (C.P.R.) is performed to save the person from this condition.
Cardio Pulmonary Resuscitation (CPR)
Cardio means heart
Pulmonary means lung
Resuscitation means resuscitation.
Our body needs Oxygen and Blood from moment to moment to stay alive.
To meet this requirement, the lungs and heart of the human body work continuously. The brain consumes 20 percent of the body’s blood. If the brain does not get oxygen or blood in less than 4 minutes, it can stop working.
C. P. R. Time is very precious and it is necessary to use every moment properly. It becomes possible only when a person is trained to behave in such situations and take decisions.
We all know that in emergency situations (be it any kind of emergency) there is a stampede and a rush and complete chaos is created.
C. P. R. Let’s remember the 7 steps.
(1) Confirmation of Unconscious state
(2) Boom/ phone for help
(3) Confirmation of breathing on or off
(4) Respiration through the mouth
(5) Confirmation of Blood Circulation or not
(6) Chest compression (for circulation)
(7) Simultaneous chest pressure and mouth respiration as per Respiration 15:2
(1) Confirmation of Unconscious state:-
(a) First position the patient quickly and properly. C. P. R. It is very important to spread the leaves on the ground to give.
(b) But take special care that there is no injury in the head and neck of the patient? Because we can cause more damage in randomly rotating a person with a cervical spine injury.
(C) Helper First of all, it should be verified that the patient is not in a dangerous condition or in a condition to harm others. For example, to safely shift a person who has received an electric shock from the injured equipment (live wire, iron, etc.) with the support of a stick or rubber tool.
(d) Shake the patient’s body as fast as possible, try to wake him up by shouting loudly, brother, uncle, sister, elder, friend……. get up get up
(e) If no response is received c. P. R. Get ready for the second step,
(2) BOOM/ PHONE FOR HELP:-
(a) As soon as the unconscious state of the patient is confirmed, the helper c. P. R. The first thing to do is to start giving, but before that, cry out for help with all your might within five seconds. Because single-handedly c. P. R. There is a limitation of – Also, it is not possible without external help to deliver the affected person, patient medically as quickly as possible and if necessary to shift the hospital. And once C. P. R. (After getting caught up in the work, the cry for help is forgotten.)
For (b) full force keep saying ‘someone help, run, someone’s life is in danger, some doctor call an ambulance, help, help, help, help’.
(C) Telephone dialing of 911 numbers abroad results in immediate treatment service trained helpers arriving within minutes with an ambulance and necessary equipment.
(d) We at Machine Life India- this organization is also trying to deliver medical help with ambulance and equipment to the emergency site as quickly as possible for an urgent treatment service, and we need your cooperation, blessings and help in this.
(e) then quickly shouted for help again c. fee. R. Prepare for the third step.
(3) Confirmation of breathing on or off:-
(a) After giving the correct position of the patient, the correct position of the helper is also effective c. P. R. It is very necessary.
(b) To check whether the patient is breathing or not, the helper should sit on the right knee in front of the patient’s head and the helper’s ear and cheek should be in front of the patient’s nose and the eyes should be towards the chest.
(C) If patient respiration is stopped, as soon as it is confirmed put fingers in the patient’s mouth (wearing gloves or with a handkerchief) If any foreign object (coins, keys, soil) is found in the mouth, remove it immediately, it is possible that Patient’s breathing may have stopped due to suffocation due to entrapment of such foreign object. If there is foam in the mouth, wipe it quickly with a handkerchief.
(d) Mostly in the unconscious state the relaxation of the tongue muscles obstructs the respiration tube (apoglottis). So head down – jaw up.
(e) C from the right side. P. R. The helper should put his left hand on the patient’s forehead and lower the head and raise the jaw with the right hand. By doing this, the mouth of the respiration tube will open and the air movement in the lungs can be done easily.
(f) Now proceed to the very important fourth step.
(4) Mouth to mouth respiration (mouth to mouth respiration) from the helper’s mouth to the patient’s mouth.
(a) After giving the head down, chin up position, the assistant quickly opens the patient’s jaw with the right hand, which is used to raise the jaw, and the left hand, which is used to lower the head, on the forehead. Put the fingers on the patient’s nose, close the nose.
(B) The helper himself should take a deep breath, over the patient’s mouth, and exhale forcefully in the position mentioned above (means the helper should take a deep glass from the outside, exhale into the patient’s mouth)
(C) For each Respiration for two seconds, we then make the Patient hold for 2 seconds for exhalation and then give another Respiration. Thus, if one cycle is completed in four seconds, respiration can be given 15 times in one minute.
(d) Now turn to immediate circulation after Respiration.
(5) Check for circulation
(a) If the blood is circulating, it can be known by the pulse.
(b) For this the assistant should place two fingers under the jaw with the right hand on the right side of the thyroid cartilage. So that the pulse can be felt.
(C) This pulse is from the right sided carotid artery. Never apply pressure to the large arteries on both sides at the same time.
(6) Chest compression (for circulation).
(Steps no. 3 and 4 are for working the lungs, then this fifth step is very important for the circulation of Blood.)
(a) First of all the position of helper is very important. The assistant should take the kneeling position next to the right side of the patient’s chest.
(b) Turn the hand over the patient’s chest and locate the middle bone of the chest (sternum – sternum) and place the upper part of the palm of the right hand on the lower half of the wound. Place the palm of the left hand on the right hand. do
(C) Place the helper’s body weight on the arms in such a way that the chest area is pressed by 1.5 to 2 inches. Helper loudly 1,2,3… while doing chest compressions. Push while saying M fifteen times, push M once every second.
(d) c. P. R. This is a very important phase.
(e) Correct chest pressure is essential. By keeping the elbows straight (locked), the entire body weight of the helper can be used to push the patient’s chest, and only then can the chest be lowered the necessary 1.5 to 2 inches. Which as mentioned earlier is necessary for the circulation of Blood.
(f) Thus c. P. R. The first cycle of But to relive life this c. P. R. It is necessary to continue.
(7) Simultaneous chest compression and mouth respiration as per Respiration 15:2:-
(a) C. P. R. If there is no other knowledgeable person helping in the action and there are only two helpers who are the patient at the scene, then the helper has to keep doing steps number 4 and 6 simultaneously.
(b) Article no. According to 6, after fifteen seconds of speaking 1, 2, 3, give pressure on the chest, the patient’s chest should be at least 1.5 to 2 inches and immediately after fifteen seconds, the helper changes the position, the patient closes the nose, head down, jaw Raised, the first helper takes a deep respiration and gives 2 deep breaths every 2 seconds to the patient’s mouth – and again takes the position for chest compressions and pushes on the chest.
Given by the individual c. P. R. –
(1) which fortunately for us at the scene 2 c. P. R. If a knowledgeable person is present, be their sole leader and do the steps number 1 to 7 first as mentioned earlier.
(2) Thereafter the other person only steps no. According to 4, the patient should breathe through the mouth, and the first person should do step no. Apply chest compressions as per 6.
(3) When the first person says 1, 2, 3 and gives pressure on the chest fifteen times every second, then immediately give respiration through the mouth twice for another 2 seconds. Thus both of them simultaneously c. P. R. to continue.
(4) If Medical should be exchanged, better c. P. R. can be continued.
(5) Until external help, medical or other, arrives, this c. P. R. Action is to continue uninterrupted. It may take a few minutes or even half an hour, but the helper has to develop that ability by practicing it with proper training (education). So let us make ourselves such demons.
(6) Very nice, congratulations, give very successfully C. P. R. Having obtained scientific information about it, now let’s apply that information practically on this mannequin.
(7) First of all I will show you all the steps step by step, observe each step very carefully. So that when your turn comes, you too will be perfect. P. R. can do
C. P. R. There are 7 main steps and memorize them over and over again. Even if you wake up in the middle of the night, you should remember the same order.
(1) Make sure that the patient or the accident victim is conscious (unresponsive) and lay down evenly.
(2) Call for help.
(3) Make sure if Gwara is on or not (head down, chin up) position of the helper look at the chest, ears near the patient’s cheek and nose to feel whether respiration comes out or not and to know whether the lungs rise or fall or not.
(4) From the helper’s mouth, give two simultaneous forceful respirations into the patient’s mouth (at an interval of 2 seconds so as to allow time for the exhalation of the first respiration given mouth-to-mouth or mouth-to-mouth action)
(5) Check whether the circulation is continuous or not.
(6) Compress the chest appropriately to keep the circulation going. Compress the chest fifteen times while saying 1,2,3 from the beginning, immediately after fifteen times exhale twice through the mouth as previously indicated (No. 4).
(7) External help Continue this action (steps no. 4 and 6) until medical help arrives.
Transportation of the Injured
Whenever it is not possible to give more treatment to the injured person on the spot, it is necessary to move him to the hospital as soon as possible. Care to be taken at that time is as follows.
Stop the Bleeding, try to bring out of the shock and if there is a Fracture, stabilize it and bandage the wound, then move the patient. So if it is not possible then move the injured part after giving proper support.
Especially in spinal injuries, it is especially important to watch the spinal cord while moving. Patient should be moved with special care, without haste and if there are good people, in harmony with them.
To move a conscious patient, the first aid provider should stand on the side of the injured patient and keep one hand on the patient’s waist, the other hand on the patient’s shoulder, the patient can go with the patient.
Bleeding continues, when the head is hit and the patient is in shock
If the patient is fragile and cannot hold the person giving the treatment with two hands, then he can be carried on the shoulder. Patient can be lifted horizontally on the shoulder Patient can be lifted by taking the right hand towards the leg and lifting both the legs with the right hand, the lifter can be lifted in both the above ways.
If the lifter is two people and the patient can use one or both hands, then a four-arm seat can be made and placed on the patient as shown in the picture.
Make a four-handed seat by holding the left wrist of the person in front of you with both hands and the right wrist with the left hand. Patient can hold the lifter’s shoulders as needed. If he cannot use his hands, then a two-handed seat should be made and the patient should be raised.
In another way, one lifter should lift the patient from between the legs from below the knees and the other from behind by passing his hands through the armpits and pressing the knuckles of his hands on the chest.
Two people can also carry the patient sitting on the stick as shown in the picture.
A patient with more problems should be taken on a stretcher. If there are three people while taking the patient on the stretcher, it will be easy to lift. One person should support the head, neck and shoulders. The second supports the ankle and the upper part of the leg and the third supports both the legs from the knee and below the knee to raise the patient. If the patient is unconscious, the fourth person should hold both hands from the head. A patient with a wound should be taken on a stretcher. The details of which are given in the figure. Three people have shown in the figure how to lift the patient and lay him on the stretcher.
If there are only two people to lift the patient, lift the patient on the stretcher. An injured person should not try to remove a splinter or something like that inside.
If there is no stretcher available at home, make a stretcher by passing two sticks through the sleeves of the coat so that the patient can be laid on the back of the coat so that the inside of the coat is facing outwards. Tons of coats should be closed and kept down. So that the patient does not feel.
If there is no place to turn the stretcher, then lay the patient on a strong sheet or wound bed and drag the patient to the stretcher.
If the patient can sit, he can be lifted in a chair.